|
In This Section
Creating Prospects
To begin the creation of a new prospect, choose Prospect from the drop down list on the top left of the form, then click the Add button located in the bottom left corner of the form.
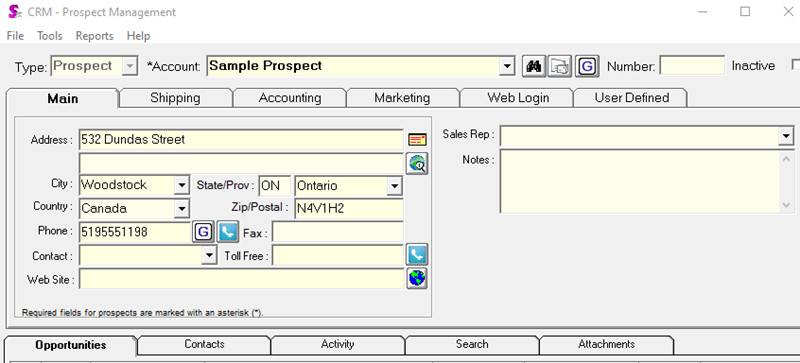
Enter the prospect name and address in the fields displayed above. If the city, state or country does not exist in its respective combo, simply type it into the field and the new record will be saved into the database and is available for selection for subsequent addresses.
Tax Group drop down menu is visible for both Customers and Prospects on the Accounting tab of CRM. The selection of the tax group is optional for prospects.
Also when converting the Prospect to a Customer the tax group assigned to the Prospect will be applied to the new Customer.
Creating Suspects
A suspect is a person or company that you have not had previous dealings with but would like to target as a potential customer for your business, not yet a prospect. A common example of suspects would be a list gathered from a Trade Show.
To begin the creation of a new suspect, choose Suspect from the drop down list on the top left of the form, then click the ADD button located in the bottom left corner of the form.
NOTE: That a suspect MUST be promoted to a prospect in order to create an Estimate for them.
Creating new Prospects from Estimating
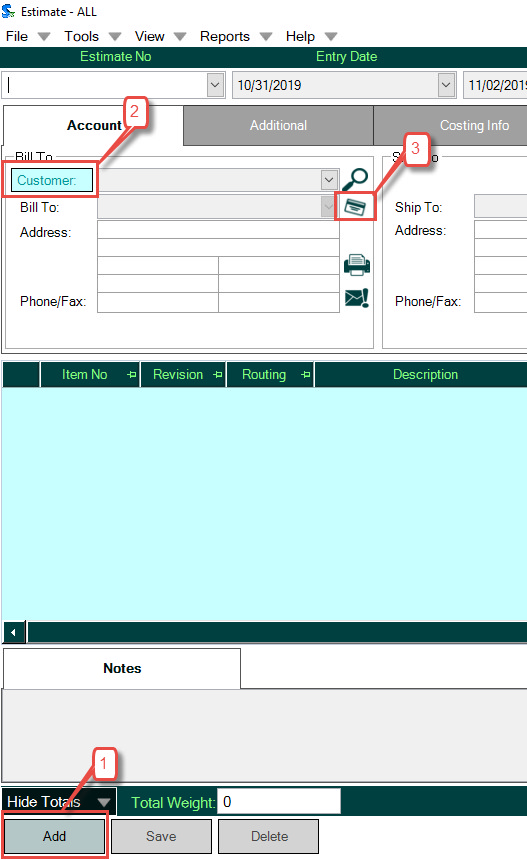
Open the Estimating module and click the Add button. Since you will be selecting a prospect, click the Customer button located to left of the Account drop down to toggle to prospect mode. Next, click the Change Prospect button to open the Prospect Maintenance form (CRM).
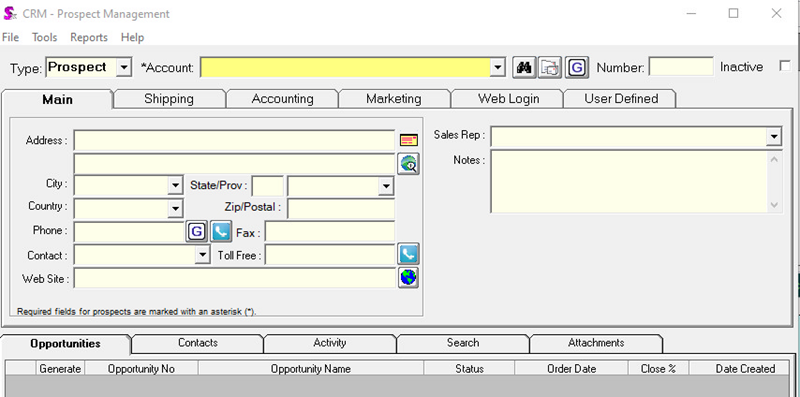
The CRM module will be launched blank and in prospect mode, ready for you to begin creating a new prospect.
Complete data entry for the new prospect, save your changes then close the CRM module.
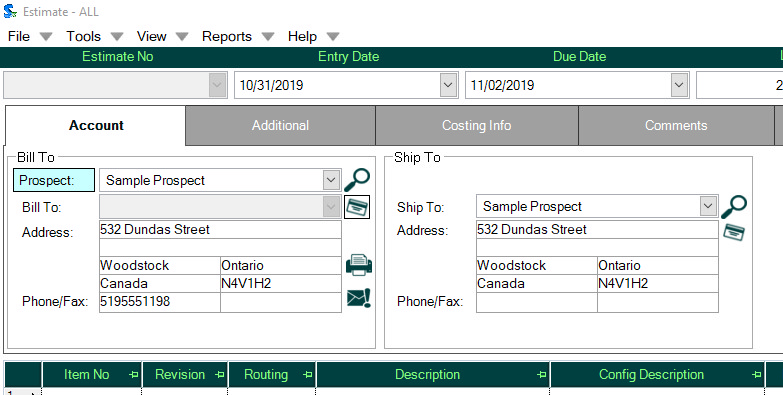
When you return to the estimate module, the newly created prospect will be already assigned to the new estimate.
Converting Prospects to Customers
Select the prospect you wish to convert to a customer from the Name drop down. Then go to the Tools menu and select Convert To Customer. The form shown below will open.
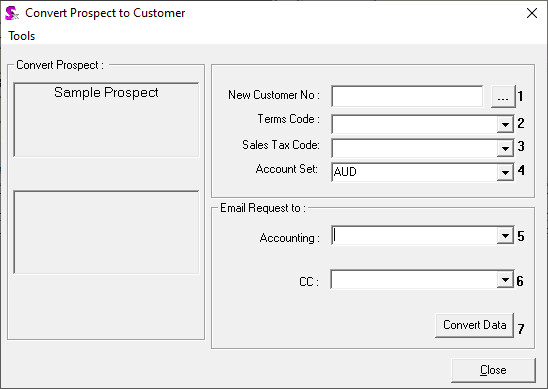
To assign a customer number to the new customer, you have the option of either manually typing in the new customer number, or clicking the ellipse button to automatically assign a customer number generated via a customer number GenKey.
Click on the Customers record at the bottom of the form then move to the top of the form to set the properties of the GenKey. Set the Start No (the number at which the GenKey will begin counting, then set the counter length (the number of digits the counter will contain. If you wish to include the date information into the GenKey, you can select the year, month, or day from any of the three date combos. When you are finished, click the Set Format button and the Save button at the bottom of the form. Note: When the customer number is generated via GenKey, the first three characters from the prospectís name will be added to the start of the generated key. Prefixes defined in GenKey Info will not be included in the GenKey.
Creating the New Customer
To convert the prospect to a customer, click the Convert Data button. You will be prompted that an email request to add the customer to the accounting system has been sent to the specified recipients.
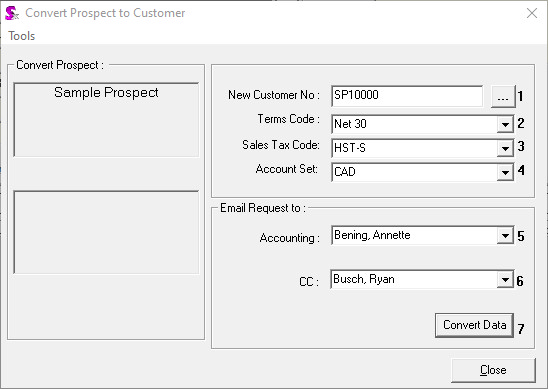
If you are using a third party accounting system instead of Seradex Financials, your accounting department must be notified about the creation of the new customer so the customer can be promptly added into your accounting system. Specify the email addresses to which a notification email is to be sent in the two email address entry boxes available.
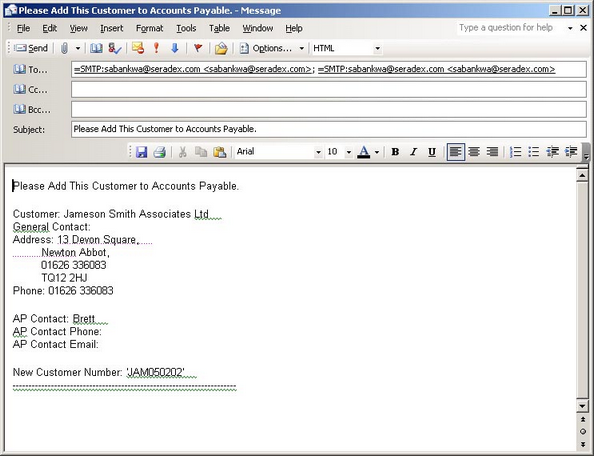
Note: The email has not been sent at this point. The email will be generated and will contain the key information required to enter the customer into the accounting system. The message will be opened in Outlook for you to review before sending.
You are able to view the newly converted customer by going to the Convert Prospect to Customer Tools menu and selecting View New Customer. This will open the Customers Lookup form filtered to the newly created customer.
|

