|
In order for the event alert executable (EventAlert.exe) to put all enabled event alerts into practice, it must be scheduled to run during the hours that reporting is required to be performed. This is done by creating a Windows Scheduled Task. To do this, open the Windows Start menu, expand the Settings option then click on the Control Panel option. Among the options you will see within in the Control Panel is Scheduled Tasks. Double click the Scheduled Tasks icon the double click on Add Schedule Task to launch the Scheduled Tasks setup wizard. This easy to follow wizard enables you to schedule the times at which the Event Alert executable is to be run and gives you the ability to fine-tune the schedule by allowing you to specify varying times by day, etc.
When first opened the Scheduled Task wizard appears as shown below.
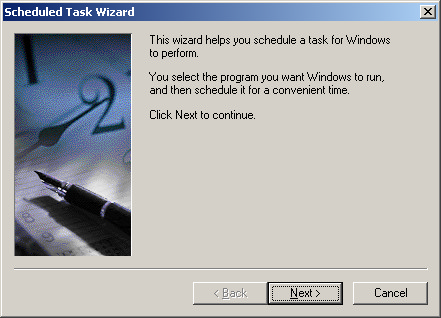 Scheduled task wizard opening screen
Click Next to proceed. You are now asked to select the program you wish to schedule to run.
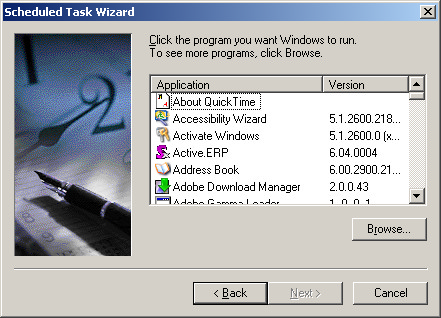 Scheduled task wizard program selection
Click the Browse button to open the Program Select dialog. Browse to the directory where EventAlert.exe is located and click Open. The wizard now requests a name for the task you are creating and the frequency the task is to be run.
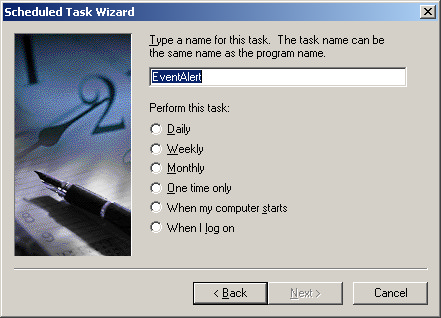 Scheduled task wizard frequency selection
You can use the default name provided by the wizard or you can specify the name of your choice. When selecting the frequency the task is to be run, if you have any enabled event alerts that do not specify an end time it is recommended that you select When my computer starts. If all of your enabled event alerts have end times then selecting Daily or Weekly is acceptable. After you have made your selection click Next to continue. If you have selected Weekly as your task frequency the next step will be to select the days of the week you wish the task to run.
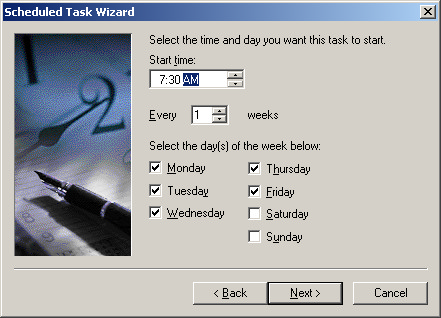 Note: This screen only appears when Weekly has been selected as the task frequency
Scroll down to see the section titled Customizing Event Alert Run Times for more information on modifying the task schedule.
The next step is to setup the account the task is to run under. By default your user name will appear in the user name field. You can change the user name to have the task run using a different valid network account. Enter the password of the account to be used then confirm it.
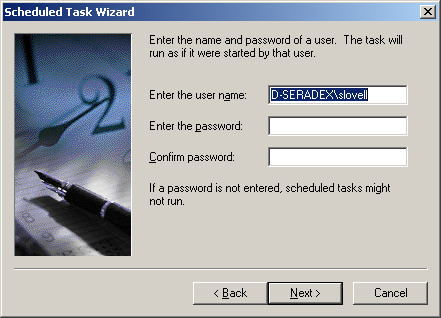 Scheduled task wizard user account selection
Click Next to continue. You have now completed the basic scheduling of event alert. If you wish to customize the event alert schedule to better suit your needs you can check the Open advanced properties for this task when I click Finish checkbox prior to clicking the Finish button. Note: The advanced properties can also be accessed later by right clicking on the event alert task in the Scheduled Tasks window and selecting Properties.
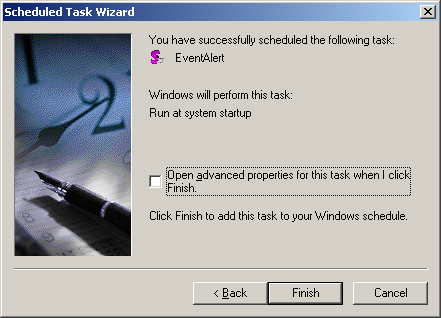 Scheduled task wizard completion screen
The advanced properties form looks as shown in the image below.
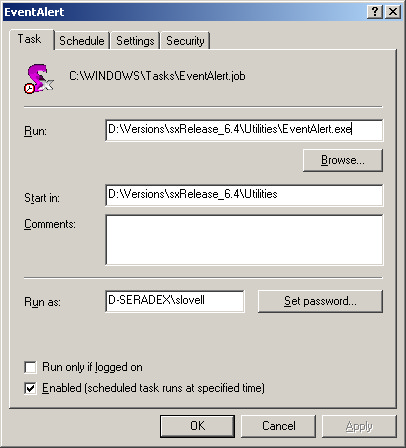 Scheduled task properties Task tab
Optional parameters can be entered into the Run text box for multi-company setup and to ensure the event alert executable never shuts down. See Event Alert Setup for Multi-Company and Ensuring Event Alert Always Remains Running for more information.
Customizing Event Alert Run Times
The Schedule tab provides you with the ability to select specific days and times to run the event alert scheduled task. If you have created the task to run daily the Schedule tab will appear as follows.
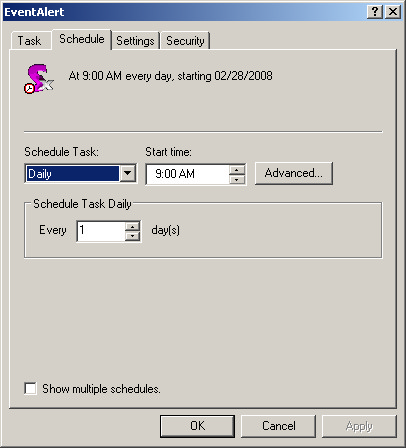 Scheduled task properties Schedule tab
The setting shown above will run the event alert task every day of the week, including weekends, starting at 9:00 am. If you wish to restrict the event alert to specific days of the week select Weekly from the Schedule Task drop down menu. You now have the option of selecting the days of the week you wish the event alert task to run.
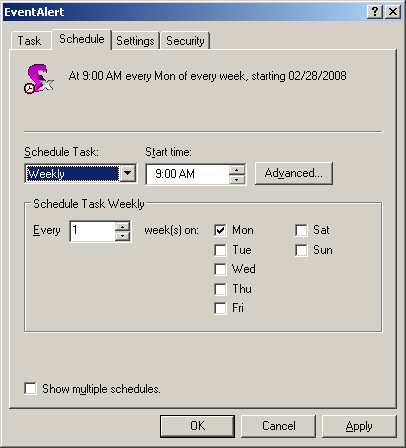 Scheduled task properties Schedule tab in Weekly mode
The above setting will only run the event alert every Monday at 9:00 am. You can take things a step further and schedule the alert to run at different times on different days. To do this click the Show multiple schedules checkbox. The form will change to allow you to create multiple schedules.
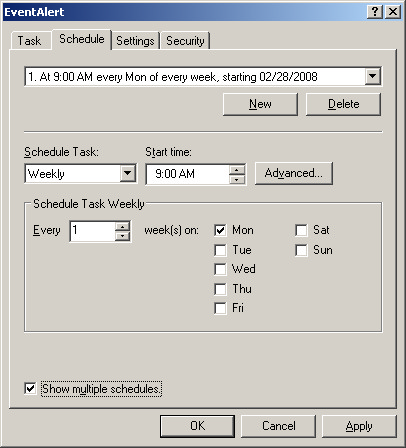 Scheduled task properties Schedule tab in multiple schedule mode
Let's say that you need the event alert to run starting at 8:30 am on Tuesday. Click the New button then proceed to setup the schedule for Tuesday by selecting Weekly as the frequency, checking Tuesday as the day then entering 8:30 am as the start time. Click the Apply button to save your changes. You will now see the two schedules you have setup in the schedule combo as shown below.
 Scheduled task properties multiple schedule combo
Event Alert Setup for Multi-Company
When setting up Event Alert in a multi-company environment, a scheduled task must be created for each company utilizing the event alert module. Follow the same steps for each company as described in Event Alert Schedule Setup. When creating the scheduled tasks for each company, give each task a name which reflects the company the task is intended for.
For each companies' event alert task view the task properties by right clicking on the task in the scheduled tasks window. In the Run field on the Task tab, enter the name of the sxRuntime ODBC connection for the company the event alert task has been created for as shown in the image below. Click Apply or OK to save your changes.
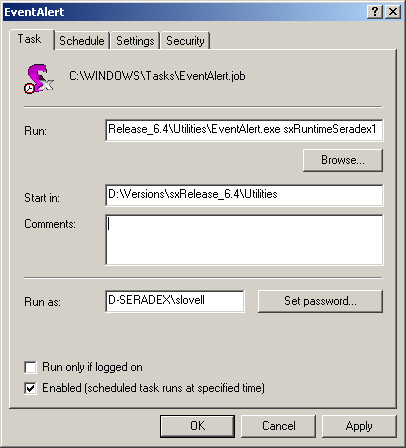 Schedule task setup for multi-company
Ensuring Event Alert Always Remains Running
If you require the event alert scheduled task to always remain running, right click on the event alert task in the scheduled tasks window and select Properties. In the Run field of the Task tab, enter /ka (ka stands for Keep Alive) after the EventAlert.exe path as shown in the image below. Click Apply to save your changes.
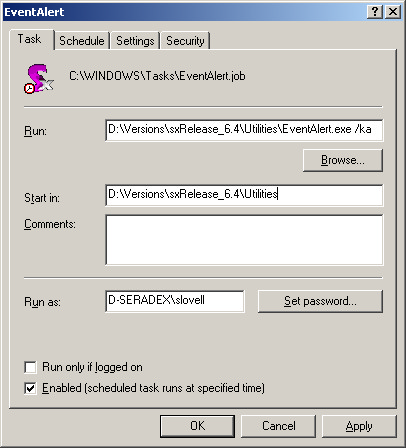 Event alert keep alive optional parameter
This alone will not be sufficient to keep the task running indefinitely. Click on the Setting tab to display the form shown below.
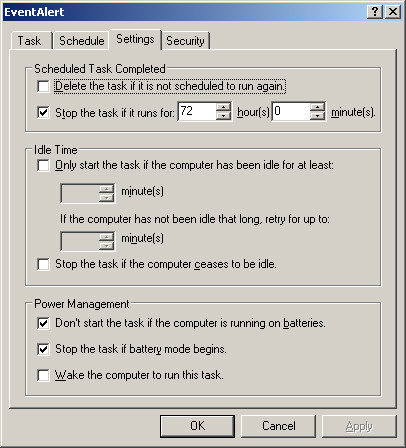 Scheduled task Settings tab
By default the task will be stopped if it has been running for 72 hours. You have the ability to modify the number of hours the task will run before shutting down, or you can prevent the task from shutting down entirely by clearing the Stop the task checkbox by clicking it. Click OK to save your changes.
|

