|
If selections from multiple configurator properties limit the available sections in a later property (a filtered property has multiple "controlling properties"), it is possible to filter the options within the affected property based on the values of the relevant preceding properties. The majority of the setup for Multiple Property Filters is done in the product line Excel workbook; logic is developed in the workbook to create a list of options based on the values of other properties and the created list is loaded into the designated property.
Filtered Property Setup
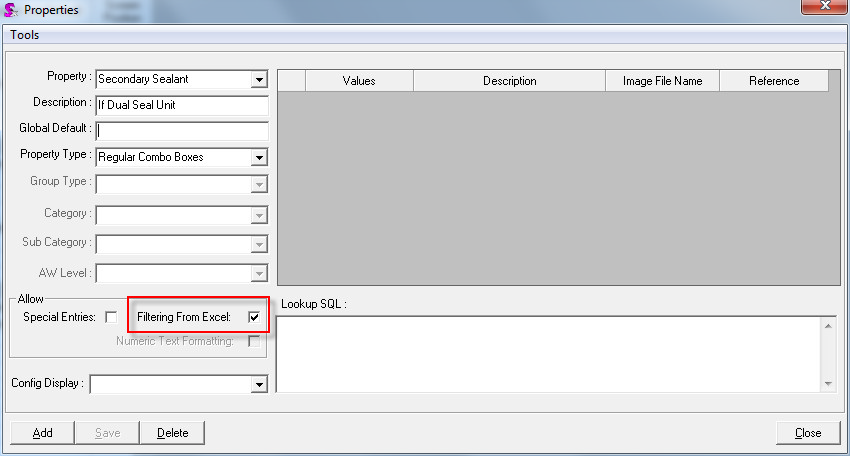
The first step is to create the property which will display the filtered list of options created in the product line spreadsheet. Create a new Regular Combo Box property for the relevant product line as would normally via Product Line Maintenance. To enable options from the excel spreadsheet to be loaded into the property, check the Filtering From Excel checkbox as illustrated in the image below. You do not any property values for this property if all options will be loaded from the product line excel workbook.

Product Line Workbook Setup
Each filtered property requires its own worksheet within the Excel workbook. The name of each worksheet must follow this naming convention:
1) If a product line caption been specified for the property the name of the worksheet must be the product line caption without any spaces preceded by "prop".

In the image above, the Secondary Sealant property has been given a product line caption of "Dual Seal". Thus the name of the worksheet for this property would be "PropDualSeal"
2) If a product line caption has NOT been specified for the property the name of the worksheet must be the property name without spaces preceded by "prop" ( i.e. "PropSecondarySealant").
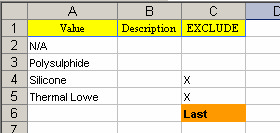
Set up the new property sheet as indicated in the image below.

Under the Value heading, list all of the property values which apply to this property. These values are the selections the user is able to choose from when creating a configuration. You may also optionally enter a description which will appear as the second column in the property drop down menu when creating a configuration. The Exclude column controls which options are loaded into the property and returned to the configurator as selectable options for the user. If the Exclude field is blank for a listed option, the option will be loaded into the property.
Logic must be developed in the Excel workbook which evaluates the values of the relevant properties in the workbook Input sheet (or any other worksheet which contains the data to be used in this evaluation) and determines which options are required to be excluded.
In the example above, since the Exclude field is empty for options N/A and Polysulphide, these two options will be loaded into the property and will be available to be selected by order entry users. Data in the Value column will be returned to the Configurator as the property value and the data in the Description column will be returned as the property value description.
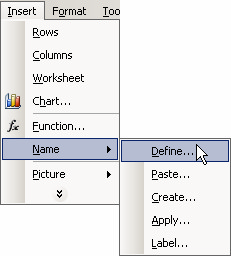
Similar to the BOM and Routing sheets within the product line workbook, you must define the last row to which data is going to be read by the Configurator. While viewing the newly created property sheet in Excel, go to Insert > Name > Define.

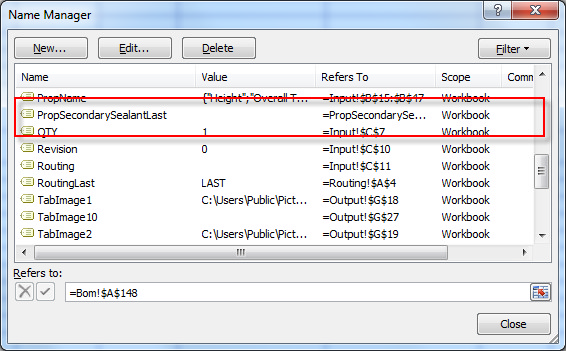
In more recent versions of Excel (2007 and later) click on the Formulas tab, click on the Name Manager button then click New.
This will display the Define Name form. Click the Add button and enter the name of the sheet followed by “Last”. Then select the cell to which the name is to be applied.

|

