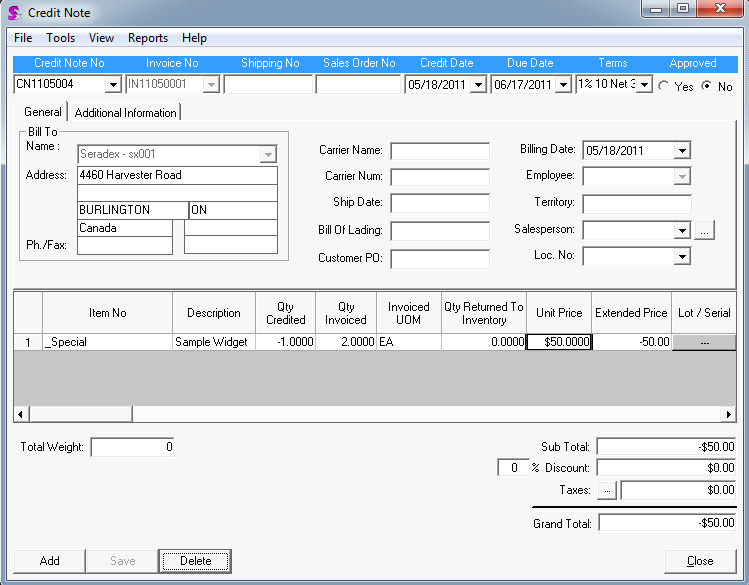
| 1. | Open the Credit Note module from within the profile bar |
| a. | Alternatively, the credit note module can be reached directly from the financials module by clicking on the Accounts Receivables >> Credit Notes |
| 2. | Press the add button to begin the process. |
| 3. | Select the invoice that you would like to credit |
| 4. | Specify the qty that you would like to credit. |
| a. | The unit price is filled in automatically based on the orginal value of the invoice. However, this can be manually overwritten to allow partial dollar amounts of credit. |
| 5. | Verify the qty to be returned to inventory. |
| a. | This is filled in automatically to = the qty credited. However it can be manually set to a lesser value. |
| b. | Note that this will place the inventory back thus increasing the qty and dollar amount of your inventory system and GL Account. |
| 6. | Save and approve the Credit Note. |
| 7. | Open the Day End Processing module from the profile bar |
| a. | Note that this can be accessed from the Financials system by clicking the General Ledger >> Day End Processing |
| 8. | Select the accounts receivable button on the top left |
| 9. | Press the Load Trans button to display the list of invoices and credits that are pending the post into the Financials system. |
| 10. | Press post to complete the batch process. |
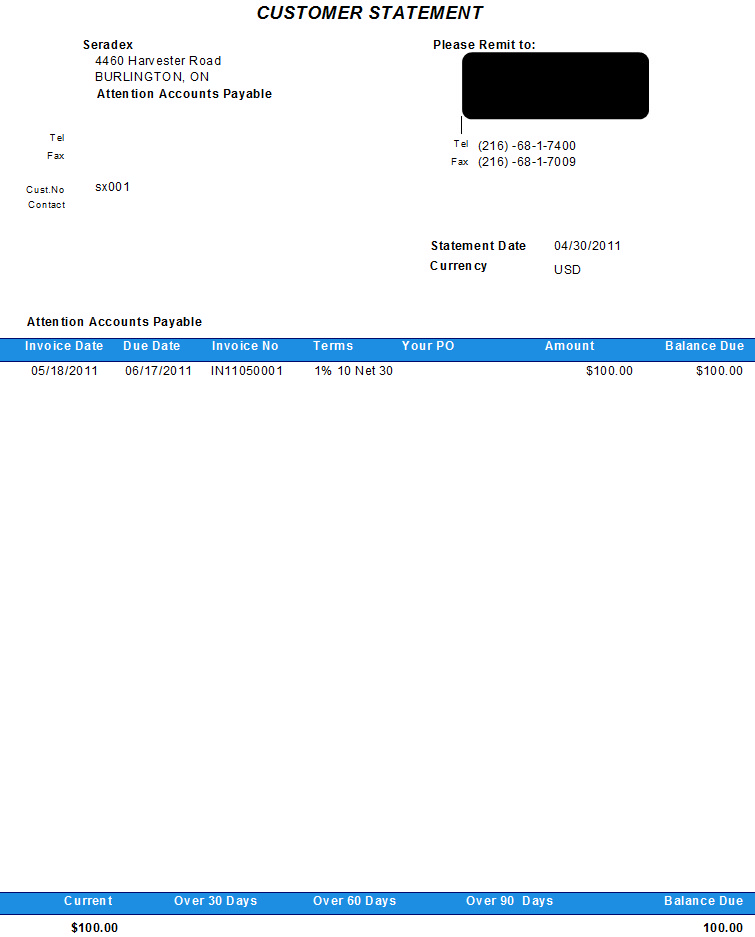
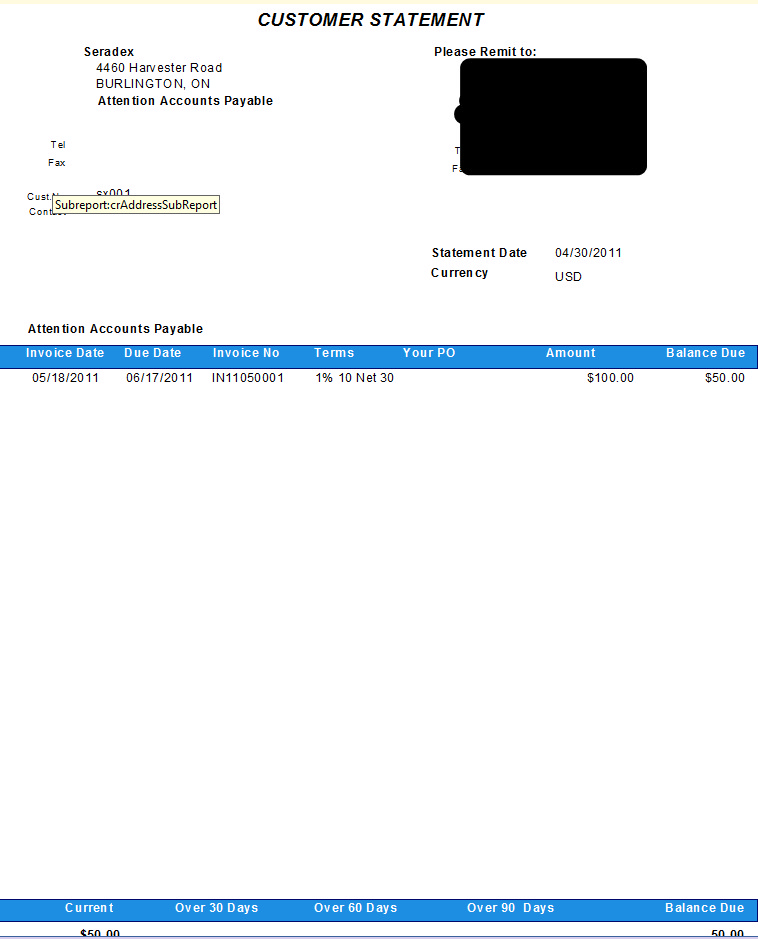
At this point, the invoice amount in the Financials system has been updated to reflect the amount of the credit note. This can be verified by running a customer statement.

|


