|
In the case that the invoice has been paid, the invoice amount can not be updated. As such, the system will simply create a credit against the customers account that will then need to be applied to an outstanding or new invoice.
| 1. | The process for creating the credit note is no different then creating a credit note for an unpaid invoice. Please reference the Crediting an Unpaid Invoice section of the manual. |
| 2. | The Financials system will now have created a credit note against the customers account. |
| 3. | Go to the Accounts Receivable menu in Financials |
| 4. | Click the Apply Credits option. |
| 6. | Choose the customer that you would like to work with. |
| 7. | The screen will not load to show all open invoices. |
| a. | The list is sorted to show the oldest transaction to the newest. |
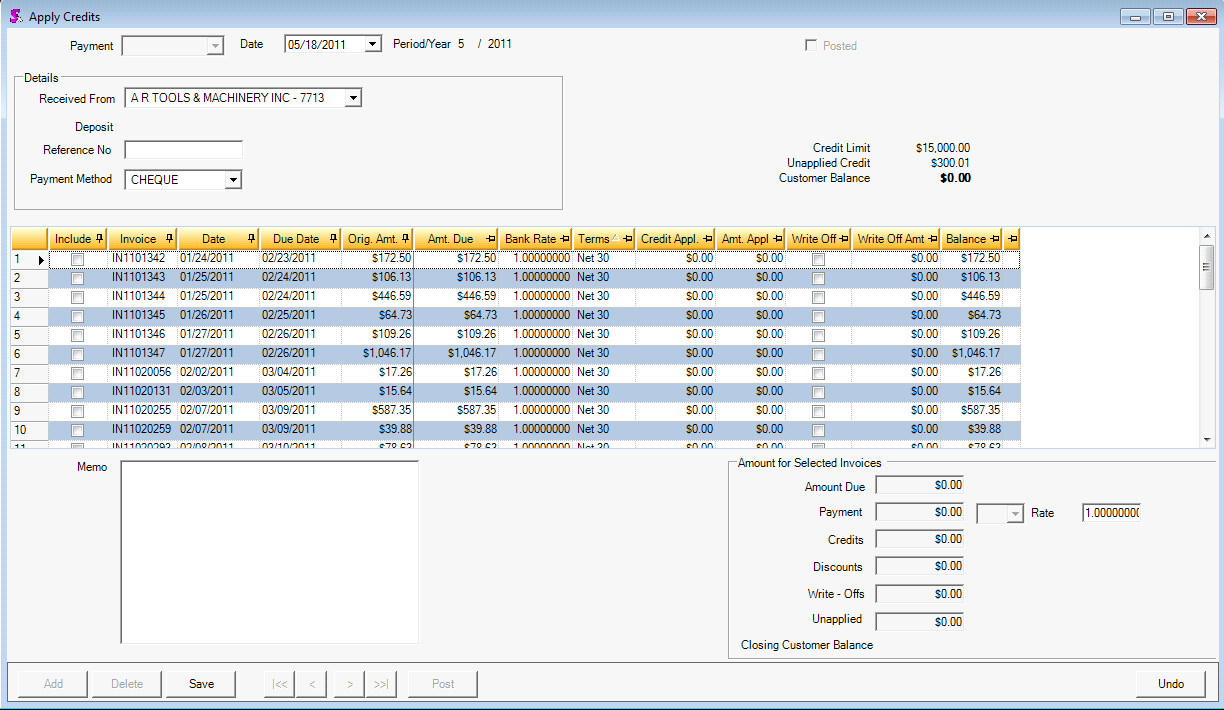
| 8. | Select and invoice that you would like to apply the credit(s) to by selecting the include check box. |
| 9. | Once an invoice is selected and there are open credits against the customer, the apply credits button will become active and visable on the bottom right of the screen. |
| 10. | Press the apply credits button to open the credits screen. |
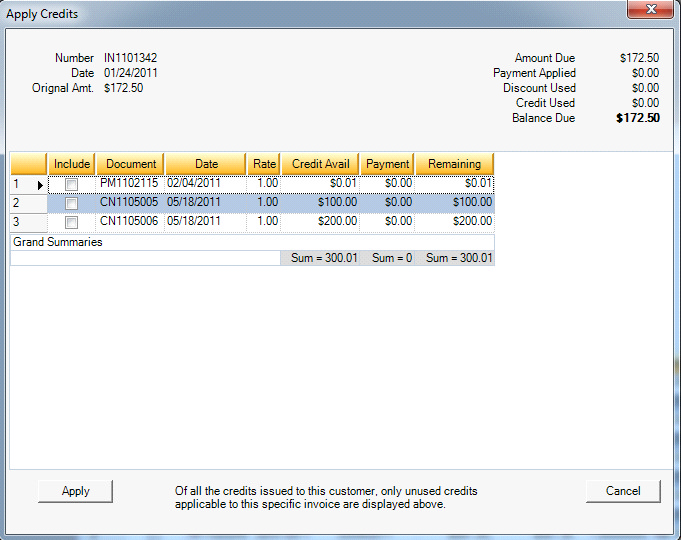
| 11. | On this screen, you will see a list of all open credits. |
| 12. | Select the include check box to associate the credit to invoices. |
| a. | Note that you can manually adjust the Payment $ amount thus allowing a portion of the credit to be applied to an invoice. |
| 13. | Press the apply button to commit the changes that you have made and return to the apply credits form. |
| 14. | The Credit applied column will now fill in to reflect your changes on that invoice |
| a. | To change the amount off the credits applied to an invoice, select the line in question and press the apply credits button again to load the screen and review your choices. |
| 15. | Once all credits have been applied, press the save button and then post to commit your changes. |
|


