|
Adding a New Tool
To begin the process of adding a new tool, click the Add button located in the bottom left corner of the form. The following fields are required:
It is not possible to create duplicate tool numbers of the same revision. If you wish to create a new tool using an existing tool number, you must enter a revision which is different than the revision assigned to the existing tool.
You must assign the new tool to a work cell to be able to save the new tool. Select a work cell the tool is used in from the Cell combo. If the tool is used in multiple work cells, press the Insert key on your keyboard to add a new line to the cells section of the form and continue to select another work cell.
Optional Information
To assign an image to a tool and display the image on the tooling form, click the ellipses button located at the end of the PDF or JPEG text box. This will open a dialog box which enables you to browse to and select the required file. Image files with a height greater than 130 pixels will extend beyond the viewable attachment area.
To assign the physical location in your manufacturing facility where the tool is stored select an inventory location from the Location combo. A Rack / Bin location may also be assigned if applicable. You are able to specify the vendor the tool is purchased from by selecting the appropriate vendor from the vendor combo; however, this does not make the tool eligible for section in the purchase order module. The Note field can be used for any miscellaneous comments applicable to the tool.
The Status combo located on the tooling form header displays generic stat codes (stat codes which have not been assigned to a particular module), or stat codes which have been assigned to the tooling module.
A completely set up tool is featured in the image below.

Modifying Existing Tools
A tool can be modified at any time by simply making the necessary change and clicking the Save button. The only field which cannot be modified is the Tool No.
Deleting Tools
If a tool has not been assigned to the labour operations of an item's bill of material, either via the Item Editor or the related product line's excel workbook, it may be deleted by clicking the Delete button located near the bottom of the tooling form. However, if you attempt to delete a tool which has been assigned to an item's labour operation you will receive the following prompt:

The tool must be removed from the items and item specs it has been assigned to before it can be deleted. If it is imperative that the tool be deleted in this situation please log a request via the Seradex Customer Care site.
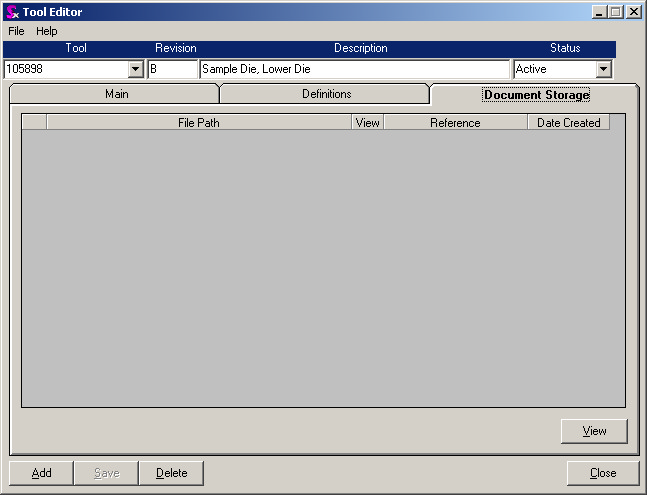
Document Storage
The Document Storage tab enables you to attach and view document related to a specific tool. To attach a document to a tool click the document storage tab to view the document storage form. The form appears as shown below.
Click in the blank area below the File Path caption and press the Insert key on your keyboard to add a new line. Double click in the File Path field of the new line to open a dialog which allows you to browse to the document you wish to attach to the tool.
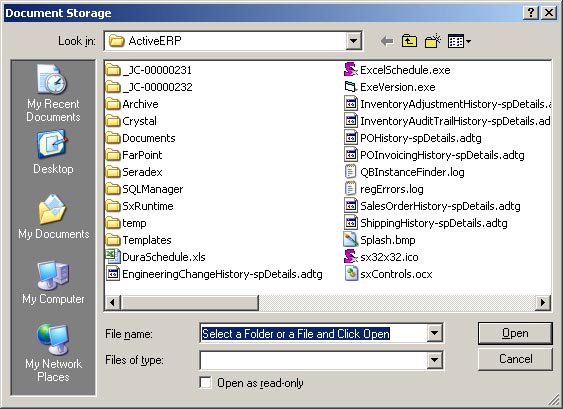
Select the document to attach and click the Open button. This will place the document name and the path to the document in the File Path field. Note that this creates a link to the file; the file must be located in a location that is accessible by all required users.

Click the Save button to save your changes. To view the attachment click the View button. You have the option of entering comments into the Reference field and entering the Date Created. To attach a document press the Insert key on your keyboard to add another blank line and repeat the process.
Assigning Tools to Item Labour Operations
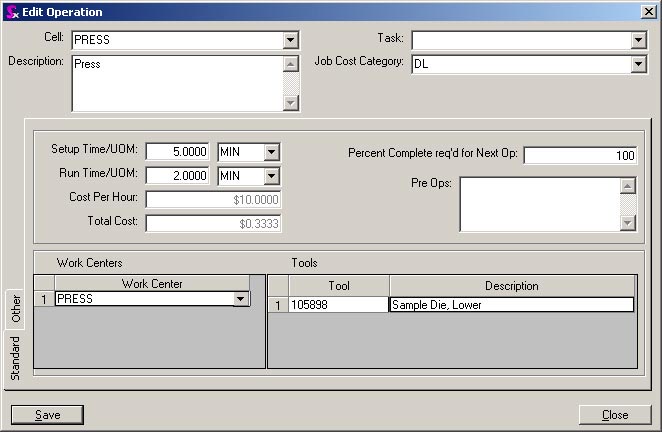
To assign a tool to an item's labour operation, select the item in the Item Editor to view its bill of material. Right click on the relevant labour operation and select Edit Component or select the labour operation and press CTRL+E on your keyboard to open the Edit Operation form. Click the blank area in the Tools section of the form and press the Insert key on your keyboard. Open the Tool combo and select the appropriate tool to assign to the current labour operation. Be sure to save your changes. Note that only tools which have been assigned to the current labour operation in the tooling module will appear in the Tool combo.
For information on how to assign tools to labour operations of configured items see Assigning Tools To Labour Routing.
|


