|
Single BOM Change
The Single BOM Change tab is used to log requests to add or delete child items from a bill of material. A fully populated sample of the form appears in the image below.

To select the Item that you want to change, click on the Item No box and scroll up or down to find the item. Click on the item and the information will be displayed on the appropriate boxes.
Then click on the Replacement Item No and select as you did with the Item No. When you finish selecting the items that wants to change, then select from the Add/Delete column if you need to add or delete that item.
Now it is important to enter the rest of the information in the right boxes. Qty Per is the quantity per parent. The quantity per parent may be 4 but you only want to delete 2 or add another 1 to the parent
The Write Off Qty is the quantity that is deleted. This is where you specify the number of deleted items. This does not apply when you add to the item.
Drawing is the drawing number that the change corresponds to.
Write Off Date is the affectivity date of the change.
In the detail box you enter any notes that are appropriate to the change
In the Employee box select the employee that has authority to approve the change. Then select the title of that employee in the Title box and the affectivity date. Click on the Approved box for a check mark.
On each engineering change form line item you can add a file attachment for a drawing, Word document, Excel or .gif. To attach a file, right click on the relevant line and select File Attachments. This will open a dialogue by which you can browse and select the required file.
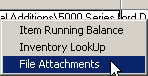
The right click menu also enables the user to check the item running balance and the inventory level of the child item entered on the selected line.
After you finish entering the information in the right boxes now you are ready to save the request. Click on the Save command and the system will display the engineering change request number.
Item Change
The Item Change tab is used when an existing item requires modifications. A completed sample is featured in the image below.

Select the item which requires the modification from the Item No combo. The Revision, Routing and Description of the item will be loaded into their respective fields. Type the changes to be made to the item into the Change Details field and enter the date by which the changes are to be made into the Comp Date field.
Item Replacement
The Item Replacement tab is used when an existing item is going to be discontinued and replaced by another item. A sample item replacement is featured in the image below.

Select the item which will be replaced from the Item No combo. The items Revision, Routing and Description will be loaded into their respective fields. Select the replacement item from the Replacement Item No combo. The replacement items Revision and Routing will be loaded into their respective fields. Type the reason for the replacement into the Change Details field and enter the date by which the change is to be completed in the Comp Date field.
Change Log
The Change Log tab records the employees who are required to provide approval for the engineering change and also records if the required approval has been granted. The Change Log tab appears as displayed in the image below.
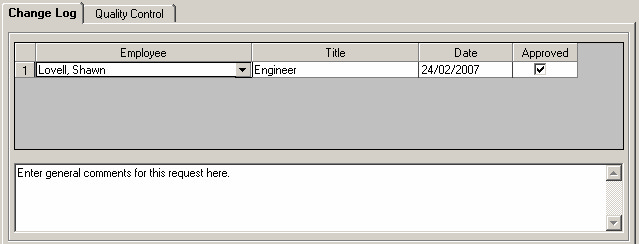
Select an employee from the Employee combo. If the selected employee has a job title assigned to them (via the Employees Lookup), the selected employees title will be loaded into the Title combo field automatically. If the employee has not been assigned a title, a title can be selected from the Title combo. When approving the engineering change, enter the date of approval into the Date field and check the Approved check box.
General comments pertaining to the engineering change request can be entered into the field at the bottom of the Change Log tab.
Quality Control
The Quality Control tab is used to record the quality control procedures enacted as a result of the engineering request. The tab appears as indicated in the image below.
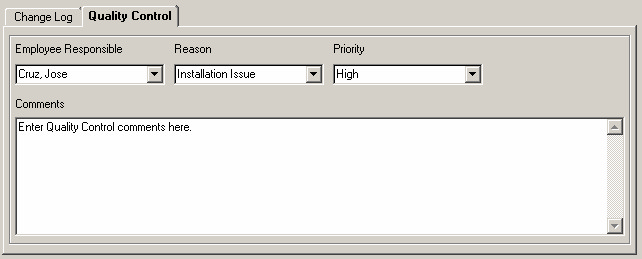
Select the employee responsible for quality control from the Employee Responsible combo. A reason for the quality control audit can be selected from the Reason combo.
If there are no reasons available in the combo, they can be entered into the system by clicking Lookups on the main OrderStream profile bar and selecting Reason Codes. The screen shown below will open.
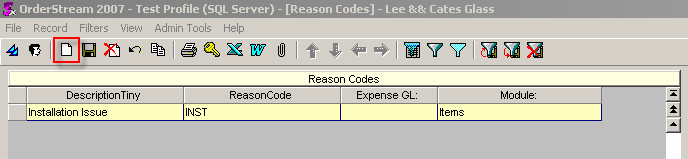
Click the page icon (indicated by the red box above) to add a new reason code. The form will change to appear as displayed below.
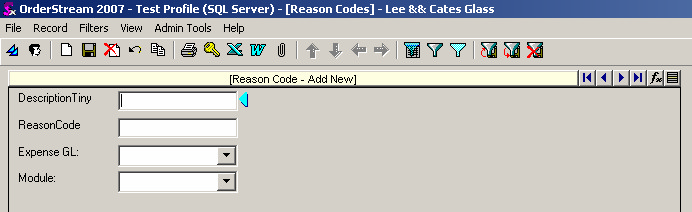
Enter a description and a reason code into their respective fields. Specifying a GL account is optional. Select the module in which the reason code is to appear in from the Module combo. To have the reason code appear in the Engineering Change module, select Items from the Module combo. Click the Save button (the disk icon) to submit the new reason code to the database.
Quality Control Tab User Control
The Quality Control tab possesses a user control which can be used for any purpose. The user control is requires setup prior to use. Please see your system administrator to have this task performed. Instructions are provided in the OrderStream Administrators section of Help.
|


