|
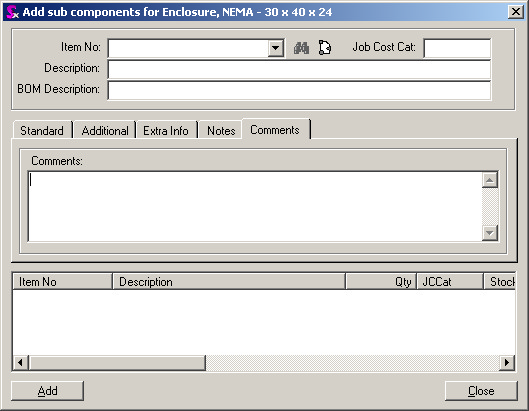
Adding Materials
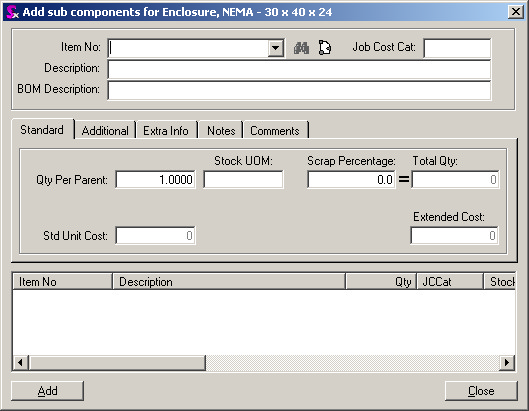
Choosing to add a material will open the Edit Component form. Proceed to enter information as follows:
1. Choose the item from the drop-down menu or by using the type-ahead feature.
2. Edit the BOM Description field if needed
3. Fill in the Qty Per Parent field. This is the amount of the material that is required by the parent item. If there is a scrap component, fill in the percentage
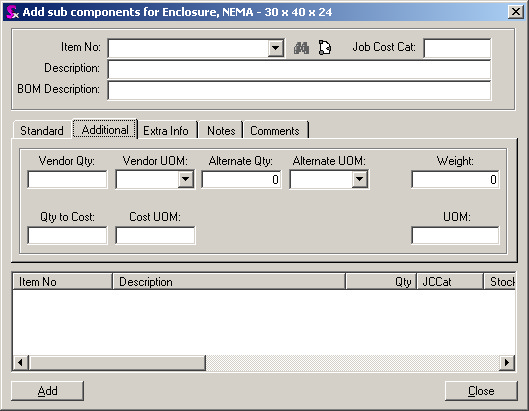
4. On the Additional tab you can see the UOM conversions for the item
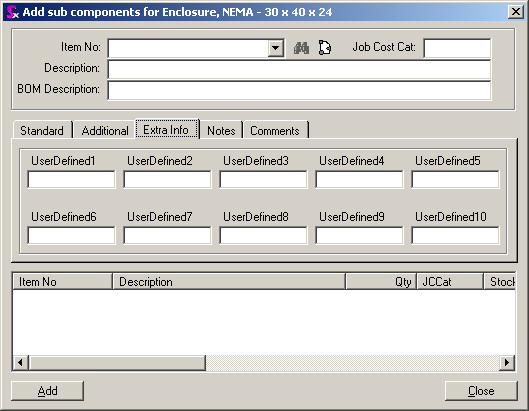
5. On the Extra Info tab there are additional fields to identify the item
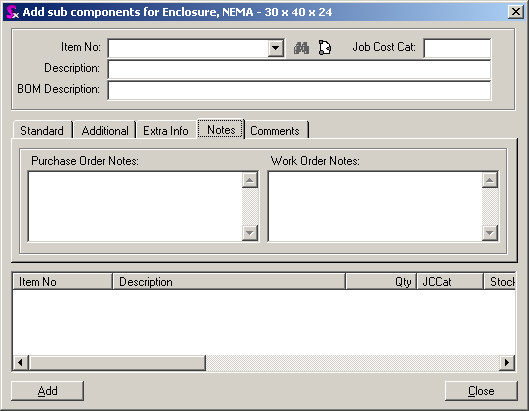
6. Add any special notes that are required into the field labelled Purchase Order Notes. Items such as packaging instructions for the vendor. These comments will appear as line comments on purchase orders generated via the Mat Req or Sub Contracting modules (the item must be non stock or a sub contract service)
7. Add any special notes that are required into the field labelled Work Order Notes. Items such as packaging instructions or plating specifications should be added here.
8. Enter any required general comments into the Comments field on the Comments tab.
Once the above steps have been concluded, the material component can be saved into the system by simply pressing the Add button in the bottom left corner of the Form. At this time the material component will be saved and it will appear as a sub component of the parent item within the Item Tree section of the Item Editor.
Adding Labour Operations (Routing)
Choosing to add an operation will open the Edit Operation form.
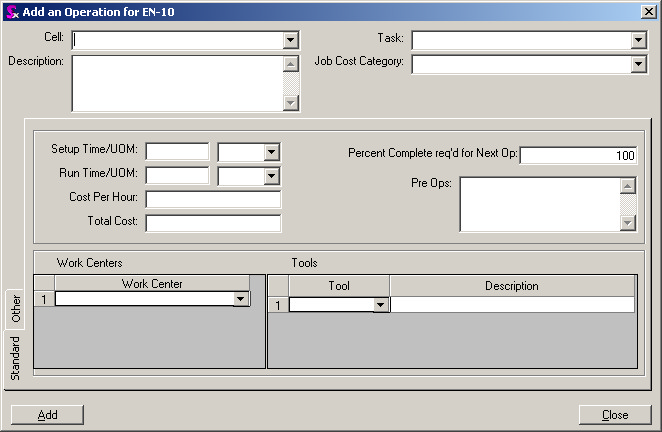
Field Reference
Field Name
|
Function
|
Cell
|
Select the desired cell by using the drop-down menu or the type-ahead feature.
|
Description
|
Describes the operation
|
Setup Time
|
The setup time is the time required to setup for the production batch.
|
Setup Time UOM
|
Unit of Measure - (Minutes, Hours or Days). If the appropriate one does not exist add it through UOM lookups as a type 1.
|
Run Time
|
The cycle time required to complete 1 piece.
|
Run Time UOM
|
Unit of Measure - (Minutes, Hours or Days)
|
Cost Per Hour
|
Will default to the Cell Value
|
Total Cost
|
Auto calculates the total cost
|
Pre Ops
|
User can define the location of the operation in the routing
|
Percent Complete
|
The percentage of a batch that must be completed before the next operation can begin. Ex Batch size is 100 pieces.
When 50 pieces are complete they can be moved to the next operation for processing. In this case, enter 50%.
|
Task
|
User can enter in the database tasks associated with the operation
|
Job Cost Category
|
Will default to the Cell Value
|
Work Center
|
If this operation can only be performed at a specific work center in the cell enter it here
|
Field Reference

Field Reference
Field Name
|
Function
|
User Defined
|
These fields can be set up with Seradex assistance
|
Work Order Comments
|
Comments can be entered here for shop floor instructions.
|
Production Notes
|
Fill in any work order instructions in the field Production Notes. This includes items such as what die is to be used etc. This can be printed on custom reports
|
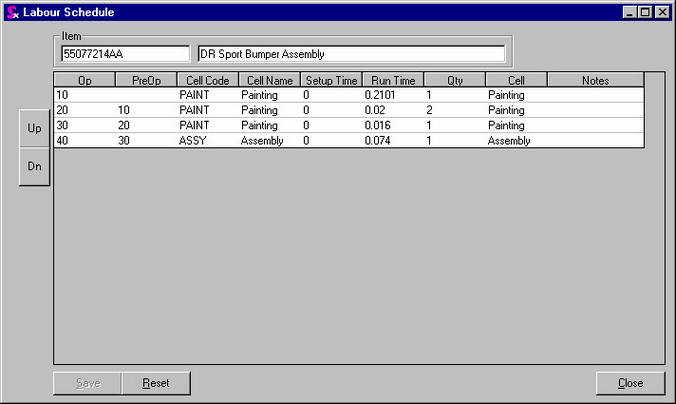
By clicking on the  icon in the toolbar of the Item Editor. This will list all labor operations for the Item. The operations can be moved up or down to get the correct sequence. In addition Pre Ops can be entered to list the prerequisite operations that must be completed prior to beginning the current operation. Multiple Pre Ops can be entered and separated by a comma. icon in the toolbar of the Item Editor. This will list all labor operations for the Item. The operations can be moved up or down to get the correct sequence. In addition Pre Ops can be entered to list the prerequisite operations that must be completed prior to beginning the current operation. Multiple Pre Ops can be entered and separated by a comma.
Once the above steps have been concluded, the labour step component can be saved into the system by simply pressing the Add button in the bottom left corner of the Form. At this time the labour component will be saved and it will appear as a sub component of the parent item within the Item Tree section of the Item Editor.
Adding Vendors
Choosing to add a vendor will open the Add Vendor form.
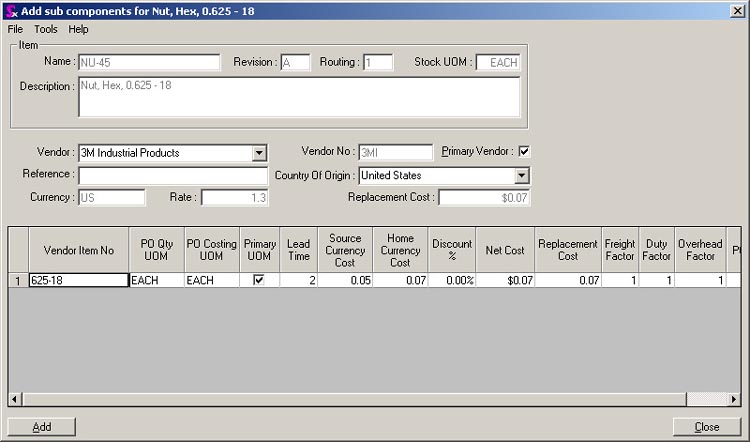
Fill in the information as follows:
1. Select the vendor from the drop-down menu or by using the type-ahead feature.
2. The Primary Vendor field will automatically fill for the first vendor.
3. The addition of subsequent vendors can become primary status by clicking in this field. The previous primary vendor will automatically become secondary.
Every buy item must have at least one primary vendor as the price that is used to perform costing calculations in the bill of material comes from the primary vendor.
| • | In the Vendor Item No. field, enter exactly what appears in the field labeled Name found in the top left of the form. |
| • | Select the UOM PO Qty field and then click on the down arrow to choose what unit of measure will be used to purchase the item. |
| • | Choose the same unit of measure in the UOM PO Costing field as in the previous field. |
| • | Click in the box under the Primary UOM field to indicate that the unit of measure that was selected in the previous steps will be the primary unit of measure for purchasing. |
| • | Enter in the items lead-time in the field Lead Time. |
| • | Enter the cost of the item, (in the vendors currency), under the field labeled Source Currency Cost. If an exchange is required, the system will automatically calculate this and enter the calculated amount in the field labeled Home Currency Cost. |
For example
If an item cost 1.00 USD, enter 1.00 in the source currency field and the system will automatically calculate the exchange at the rate specified in field labeled Rate: If that rate is 1.45 then the value that will be automatically entered into the home currency cost field would be 1.45.
| • | Freight. Use this option to establish a pre-determined freight factor to be applied to an item upon receipt into inventory. |
Item
|
Vendor Name
|
Source Currency Cost
|
Home Currency Cost
|
Cost on PO
|
Freight
|
Value of Item in Inventory upon Receipt
|
Test123
|
ACME
|
$ 100.00
|
$ 100.00
|
$ 100.00
|
1.05
|
$ 105.00
|
ABC123
|
RoadRunner
|
$ 100.00
|
$ 135.00
|
$ 100.00
|
1.034
|
$ 139.59
|
Pros
| o | The value of the item within inventory reflects the true landed cost of the item. |
Cons
| o | Can cause confusion as the Purchase Order cost of the item will not match to an inventory cost |
| o | No separate GL entry (variance) to show the difference between the landed cost and the cost on the PO. |
Note: The above example could also be applied to the Duty and Overhead options as well. All these options increase the value of an item upon it receipt into inventory. Custom reporting would be required to identify the usage of these options and their impact on your inventory valuation.
| • | If there is to be multiple units of measure that this item can be bought with, press the Insert key on the keyboard and fill in the new line that appears in exactly the same manner as the line above it was filled in. |
| • | If you are editing an item and notice the Vendor name is highlighted with a pink background, the information for the Vendor is incomplete (i.e. Vendor item number is missing or UOM is missing) |
Once the above steps have been concluded, the vendor information can be saved into the system by simply pressing the Add button in the bottom left corner of the Form. At this time the vendor will be saved and it will appear as a sub component of the parent item within the Item Tree section of the Item Editor.
Editing Existing Sub Components
To edit an existing sub component, select the sub component which requires changes and right-click on the sub component to be edited, choosing Edit Component from the menu that appears.
Remember to click the Save button in the bottom left corner after making any changes to a sub component or the information will not save into the database.
Deleting Existing Sub Components
Deleting Sub Components One at a Time
To delete an existing sub component,
1. Select the bill of material required and right-click on the sub component to be deleted,
2. Choosing Delete Component from the menu that appears. This will remove the sub component from the bill of material, but will not remove it from the database completely.
For example
If a raw material were deleted from a bill of material it would no longer show there, however that raw material would still be in the database and could be used again in another bill of material.
Any changes made to the structure of an item will not reflect on any Sales Orders or Purchase Orders that are already in the system. The changes will only be reflected on any new Sales Orders and Purchase Orders put into the system from that time forward.
Deleting Multiple Sub Components Simultaneously
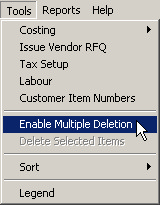
If multiple sub components must be removed from a bill of material you can save time by enabling multiple deletion, which will allow you to select multiple sub components and delete them. To enable multiple deletion, open the Item Editor's Tools menu and select Enable Multiple Deletion.
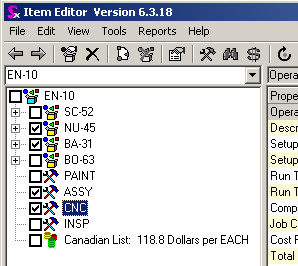
When multiple deletion is enabled, check boxes appear beside all sub components assigned to the currently viewed bill of material. Simply click the check box to select the components to delete.
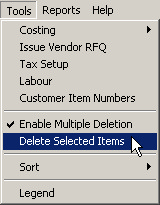
When you are ready to delete the selected components, open the Tools menu and select Delete Selected Items.
You will be prompted to check if you are sure you wish to delete the selected components. Click yes to continue with the deletion or click no to cancel.
|


