|
The first thing that needs to be done is to click the Add button located in the bottom left of the form.
Doing this will clear any information that is already on the form and prepare it for the entry of new information. The user is now ready to enter in all the necessary information. Follow the steps below to do this.
Header Section
| • | First, choose the Sales Order which is being shipped against by using the drop-down menu, or the type ahead feature in the Sales Order No. field |
| • | The Shipment Date will display the current date by default so it should not need adjusting. If it does need to be adjusted, click on the drop-down menu and a calendar will appear that can be used to pick the correct date. |
| • | Enter the Shippers name by either using the drop-down menu or the type-ahead feature |
| • | Ensure the Ship Via information is correct, and if not change it by using the drop-down menu or the type-ahead feature |
Main Body Section
| • | All the pertinent information in this area should have been populated when the Sales Order number was chosen in the header section. Ensure that it is all correct and make any changes if necessary |
Item Details Section
| • | Ensure that the Item Number and Description fields are correct |
| • | Scroll to the right until the Qty Shipped columns comes into view, and enter in the Quantity that is being shipped |
| • | Approve the shipment by clicking on the Yes option button at the far right of the header section. |
| • | Update the inventory by clicking on Tools in the menu bar, followed by Update Inventory. |
Once the above steps have been concluded, the Shipment can be saved into the system by simply pressing the Save button in the bottom left corner of the Form. At this time the Shipment will be saved and a Shipment number will be assigned to it that displays in the top left corner of the form.
The next step is to approve the shipment by clicking on the Yes option button at the far right of the header section. Once all this has been done the inventory can now be updated by clicking on Tools then Update Inventory.
Modifying Existing Shipments
To edit an existing Shipment simply choose the Shipment you want from the drop down menu in the upper left hand corner of the form and then make any changes necessary.
Remember to click the Save button in the bottom left corner after making any changes to a Shipment or the information will not save into the database.
Approving a Shipment
Approving the shipment and updating the inventory complete the shipment. Follow the steps below to complete the process.
1. Approve the shipment by clicking on the Yes option button at the far right of the header section.
2. Update the inventory by clicking on Tools in the menu bar, followed by Update Inventory.
Once a sales order detail has been completely shipped the sales order detail will be locked on the sales order form, preventing the shipped detail from being edited. If changes are required to the shipped sales order detail, it can be unlocked by updating the sales order status of the detail via the Adjust Status form.
NOTE: If you do not have access to the Adjust Status form please speak with your OrderStream administrator.
Non Shippable Items
During the process of approving a shipping document and generating an invoice, you may be presented with the following prompt:
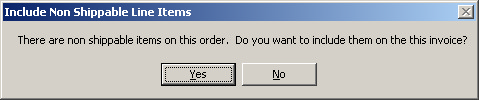
This means there are items flagged as Not Shippable are present on the shipped sales order. Items flagged as such do not appear on shipping documents, yet they are required to be invoiced. Depending on the process your company uses in regard to non shippable items, you have the option of clicking yes to add these items to the invoice, or if the non shippable items are to be invoiced separately, you may click no to exclude them from the invoice.
|


