Menu Functions


Previous Page  Next Page

File


Clears the form and enables a new sales order to be entered.

Saves the current sales order.

Deletes the current sales order.

Closes the sales order module.


Tools


Generates a work order for the currently viewed sales order.

A Material Requisition can be generated directly from the Sales Order.

Generates an invoice for the currently viewed sales order.

Creates a copy of the currently viewed sales order.  This will copy the current information from Customer to Sales Order.
The fields that will be copied are: Sales Rep, C.S.R., Freight Vendor, Ship Term, Term Code, Territory, FOB, Cust Acct Set.

Approves the currently viewed sales order.

Creates a revision of the currently viewed sales order.

Launches the Inventory Status form defaulted to the items on the sales order.

Sales Rep commissions can be edited on a transactional basis by accessing the sales order Tools menu and selecting Edit Commissions.  The form shown below will open.


clip0859


To change the amount of commission to be paid to the sales rep edit the Commission %, or if the commission is going to be shared with another sales rep edit the Split %.  The Commission Amount will be automatically recalculated.  Click the Save button to submit your changes.

The Advanced Credit Hold functionality must be activated.  If you have not purchased a license, please contact your project manager or a Seradex Sales Representative.


Advanced Credit Hold enables the system to analyze a customers credit balance in comparison to the customers credit limit.  If the value of a new sales order exceeds the value of the customers available credit, this sales order and all subsequent sales orders are immediately placed “On Hold”.  In addition, if invoices exist against the customer which have not been paid within the number of days specified in the customer's Terms Code, newly entered sales orders will be placed "On Hold".


Placing a Sales Order on hold prevents the following:

Work Order generation
Mat Req generation
Shipment generation
Invoice generation


Note: If a customers credit limit is set to 0 (which means unlimited credit), the On Hold logic is applied for overdue invoices alone.


The table below illustrates the process by which sales orders are placed on hold.  Each open sales order increases the running balance and reduces the amount of available credit.  Sales order SO-000178, which is worth $1250.00 is greater than the amount of available credit ($246.94), thus the order is placed on hold.


Due Date

Sales Order

Amount

Running Balance

Available Credit

21/07/2006

SO-000176

$2500.00

$3503.06

$1496.94

21/07/2006

SO-000177

$1250.00

$4753.06

$246.94

21/07/2006

SO-000178

$1250.00

$6003.06

-$1003.06


When payment is received against existing outstanding orders, the system will perform checks to see of any On Hold sales orders can be updated into Open status (taken off hold).  If the value of the oldest on hold sales order is less than the amount of available credit, the sales order is removed from On Hold status. 


Due Date

Sales Order

Amount

Running Balance

Available Credit

21/07/2006

SO-000176

$2500.00

$3503.06

$1496.94

21/07/2006

SO-000177

$1250.00

$4753.06

$246.94

21/07/2006

SO-000178

$1250.00

$6003.06

-$1003.06


For example, referring to the above table, if a payment is received against an invoiced sales order the next time update accounts is run, the Balance Owing value in Seradex is updated, thus recalculating the customers amount of available credit.  If the dollar value of the oldest sales order, in this case SO-000176, is less or equal to the amount of available credit the sales order is updated to Open status.


If you wish to make an exception you have the option of overriding a sales orders On Hold status.  In the Sales Order module, go to the Tools menu and select Override Orders On Hold.  Select the sales order you wish to override from the form that appears.


clip0862


This is a handy form where you need to create Work Orders and Mat Reqs for multiple Sales Orders. When you click on this function, the form appears as shown in the image below. For Sales Orders requiring a Work Order or Mat Req, click in the appropriate box to the right and then click on Generate.


clip0863


If the entire order is based on the same color you set the defaults at the header level so as you enter each line item the desired Configurator choices are already selected. The example shown below illustrates this functionality.


clip0860


1) Choose the Product Line you wish to set defaults for.

2) Using the INSERT button select the Properties and Default Values you wish to set.

3) When you are finished press SAVE and CLOSE.

4) Then go back to the Sales Order form and in the Details section with the right click menu choose Configure

5) Doing that will bring up the Item Configurator form where you will see the Property and Default Value you previously entered already included in the form.

If you have a 25 line sales order and your customer changes their color preference from White to Sandstone, you can make universal changes to the entire order and the AutoConfig will reprocess all the line items. A color choice takes just seconds.


Replace Property Mode


By default the form loads in Replace Property mode. If you were replacing product lines in the first section then it will automatically switch for you after you Process.  Please note that you cannot switch to Replace Property mode when you are in the middle of replacing product lines.


Select the line you want to change:


clip0861


Select the property you want in the “For Option” combo.  Please note that only options that apply to the selected product lines will show up here.


Now select what you are searching for within the selected option.  Notice that only the values that pertain to the selected option are available.  The <ALL VALUES> option means that instead of replacing only the value from the search, all lines selected will be replaced with that value.


The “Replace With” field will either be a combo or a text box based on the property setup for that product line. 


To select that change press the >> key. This will move the change over to the update list.  You may then select more lines and replace options and keep sending them over to the update list.


If you want to change or remove a change process, highlight the change in the list to the right, then press the << key. That will move it back so you can make changes.  Press >> again to send it back.


Once you are done, click the process button.  This will load another form that will reprocess the lines.


Replace Product Line Mode


Go to the Tools menu and select Replace Mode => Replace ProductLines.


You will notice that after you select Replace ProductLines, the “For Option” in the Replace Choices area is now removed.


Now select which line items that you want to affect (to select ALL click Toolsà Include ALL).


Select the product line you wish to search for in the list of selected product lines. Only product lines that are selected in the grid appear in the list.


Now select the product line that you want to use as a replacement by using the “Replace With” combo.


To select that change press the >> key. This will move the selected change over to the list.  You may then select more product lines and replace options and keep sending them over to the update list.


If you want to change or remove a change process, highlight the change in the list to the right, then press the << key. That will move it back so you can make any further changes.  Press >> again to send it back.


When you are done with the product lines, click the Process button to see the following message. 


clip0208


This above message will display to ask if you want to continue on with search and replace on the properties.

The Drop Shipment functionality must be activated.  If you have not yet purchased a license, please contact your project manager or a Seradex Sales Representative.


Drop Shipment provides the ability to ship non stock buy items directly from the vendor to the customer.  Only items that are set to buy and non stock with no reorder points or quantities are applicable.


Creating and Processing Drop Shipments


1)Create a sales order for a non stocked buy item.


2)Check the Drop Shipment box on the far right of the details grid.


clip0864


3)Save the sales order


4)Create a Material Requisition for the sales order.  Go to Tools/Generate Material Requisition.


5)Open Mat Req, select the sales order you are working with and click Apply Filter.  Check the Include box for the item and generate a purchase order.


6)When you open the purchase order for the item you will see the Ship To has been set to the Ship To address of the sales order.


clip0865


7)When you receive notification the item has been shipped to the customer, open the sales order.  Go to Tools > Drop Shipment.


8)The form below is displayed.  Enter the quantity to process in the process field and click the process button.


clip0866


9)When the Drop Shipment is processed, the status of the sales order is updated to either Shipped (if fully processed) or Partially Shipped (if partially processed). 


clip0867


10) Also, the status of the purchase order is updated in the same fashion.  A receipt is created and approved for the purchase order; however, inventory is not updated.


clip0868


11) The purchase order and the sales order can now be invoiced normally.


View


The View menu can be used to limit the number of sales order numbers that are loaded into the Sales Order No combo.  This may be useful to only see sales orders matching a desired status or sales orders that were entered within a defined number of days.  A sample of how the View menu can be setup is displayed in the image below.


clip0870


The All option appears in the View menu by default and when selected will load the Sales Order No combo with all sales order numbers in the system.  When a status code is selected, the Sales Order No combo will be loaded exclusively with transactions assigned to the selected stat code.


The Within options requires setup before it can be used.  It can be utilized to limit the number of sales order numbers loaded into the Sales Order No combo based on a defined number of days; using this feature increases the performance of the sales order module. 


clip0869


The Price List excel workbook is opened when selecting the Price List option.


By default, sales orders which have been canceled or have been completely invoiced are excluded from the Sales Order No combo.  If it is necessary for you to view a sales order which is either canceled or invoiced, open the sales order View menu and check the Include Invoiced/Cancelled Orders option.  The Sales Order No combo will then reload to include invoiced and canceled orders.


If you wish to always have invoiced or canceled sales orders loaded into the Sales Order No combo, click the Save Settings option within the sales order Tools menu while the Include Invoiced/Cancelled Orders option is checked.  This will preserve and apply the setting for each subsequent time you open the sales order module.


Reports


Prints the standard order confirmation report.  A custom report can be configured to launch via this menu option in place of the standard report.

Enables the user to select a range of sales orders and print an order confirmation for each sales order in the selected range.

Prints the standard sales order pick list report. 

Enables the user to select a range of sales orders and print a sales order pick list for each sales order in the selected range.


Options


Enabling this option will display a prompt each time a different ship to address is selected asking the user if they are sure they wish to make the change.

clip0871

Clicking yes will permit the ship to address to change to the user's selection, while clicking no will restore the ship to address to the previous selection.

Enabling this option will display a prompt each time a different sales rep is selected asking the user if they are sure they wish to make the change.


Enabling this option will display a prompt each time the value of a sales order is modified asking the user if they are sure they sales rep commissions to to be recalculated.


Help


This will take you to the online help manual located at www.seradex.com/help

Provides information about the Sales Order module such as the version number.


Grid Context (Right Click)


Opens the Item Editor to display the bill of material for the item on the selected line.

To illustrate how the Configurator works it is easier to show the end result and then discuss the setup required to achieve the end result.


1) From within the Sales Order screen select a line item.

2) Right Mouse Click and select the Configure selection as shown in the following image. This will display the Product Configurator screen.

3) Then select the desired Product Line from the drop down combo.
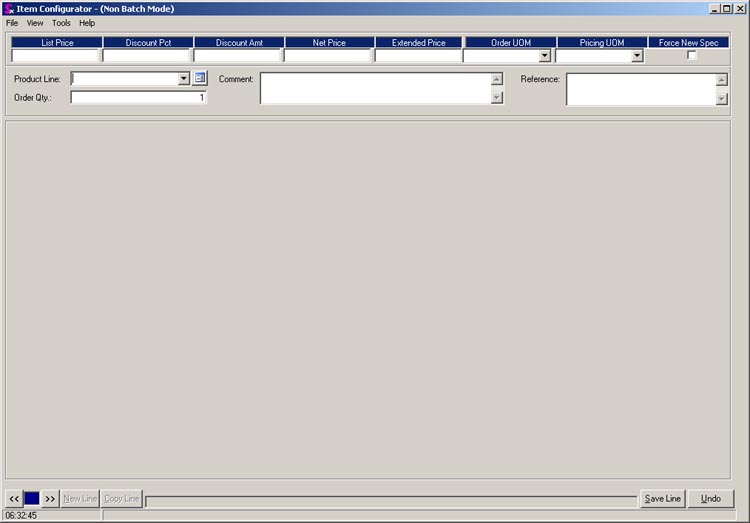
 

clip0173


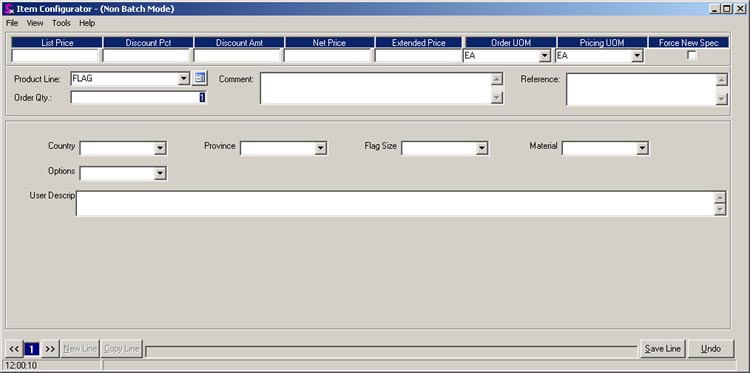
4) When the Product Line is chosen the relevant properties will be automatically displayed as shown below. This figure shows the Product Line Flag and the properties that must be entered for a flag:


Country (If Canada is chosen, Province displays. If USA is chosen, State displays.)
Province
Flag Size
Material
Options


clip0211


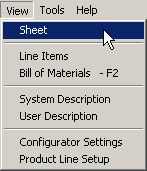
5) Select the proper choices by selecting from the drop down boxes from each property.  If desired you can click on the View menu and select Sheet. This will then display the Excel Rules Spreadsheet.
 

clip0171


clip0170


6) After all the choices have been selected click Save Line and this will return the configured line item back to the sales order.


NOTE:

It is possible to assign the cell an item it is used in by entering the Cell Code into column AH of the BOM worksheet on the row occupied by the item you wish to make this assignment for. This setup is not reflected in the Item Editor tree view however you can see it by right clicking on the item and selecting the Edit component.  Click on the Additional tab, you will see the Cell Code selected in the Cell Code field.


Force New Spec


You Force New Spec (checked) when you want to force the configurator to create new spec data based on the config sheet regardless of any pre-existing spec based on the PropText.


The PropText used when the Use System PropText? setting is set to (-1) is the System PropText which is a combination of the selected options and Product Line Revision Version from Input C11.


The PropText used when the Use System PropText? setting is set to (0) is the description from Output C5. If this description does not identify a unique configured item based on the options chosen then the system is likely to pull a previously configured item which does not match the options you have picked.


To eliminate this problem you will have to Force New Spec to prevent it from looking for an existing item in the system.


Alerts on Save Line


When you click Save Line on the configurator, the configurator goes into "Save Mode".  When the configurator is in save mode a 1 is written to cell J26 of the Input sheet.  When the configurator exits save mode the 1 is cleared.  If you wish to create an alert which checks to see if a property has a value prior to saving the configuration, you can include Input!26 into the alert formula.


EXAMPLE: If you use something like IF(AND(Input!26=1, Input!C52-""), TRUE, FALSE).  If the user clicks save line and Input!C52 is empty, the alert will be displayed.


Also depending on the alert level specified your user will be either prevented from continuing to save (level 2) OR the alert will serve just as a warning (level 1) which they can either dismiss and continue or stop the save process to edit configuration.


If any alert has been specified as critical you will not be able to save the configuration until changes are made to prevent the alerts from being displayed.  To specify an alert as critical enter 2 into the level column (B) of the Alerts worksheet onto the row occupied by the appropriate alert.


Mastering New Items


Open the Configurator form and enter property values as you would normally.


Functions

Function

Create a new item from current configured specifications?

Clicking OK will create the new item number while clicking CANCEL will submit the configured item to the sales order line as a typical configured line item.

When creating a new item, this option will be the only one available.

Use Existing Item? (ignore current configuration)

Use the item that already exists.

Update Existing Item?

Select this option when you wish to update an item that already exists in the system.

Create a new revision?

When you choose this option the revision text field will change to the next corresponding letter or number.

Change Item No and create new?

This option will allow you to change the Item No in order to create a new item.

See screenshot below.

Update Only the Item Spec for Mastered Item?

This will change the item for the current order only.


NOTE: that the newly created item number is displayed in the window title bar.


If you click CANCEL, this tells the system that you do not wish to create the new part number, thus the product line item number is assigned to the transaction line.


If you are configuring over an unrelated item (different item number) which you have loaded onto the transaction line prior to opening the configurator, this unrelated item will not be updated to possess the attributes of the configuration.  Instead the item will be replaced with either the new item number (if you click OK when prompted to create the new item) or the product line item number (if you click Cancel when prompted to create the new item).


The item on the sales order line will now be the newly mastered item.

Creates a copy of the selected line.

Opens the UOM Conversion form to display the UOM conversions that have been applied to the item on the selected line.  The user may also create new UOM conversions against the item.

When this option is selected by right clicking on the desired Sales Order detail, a form appears which simply displays a list of all the Tax Authorities, and their values, applied to that particular line item.  From this form it is possible to apply a different Tax Group to the particular line item by selecting the new group from the drop-down menu labeled Tax Group: and then clicking on the APPLY button.


clip0821

Opens the Sales Order Search form.

Opens the Item Running Balance form defaulted to the item on the selected line.

Opens the Inventory Lookup form defaulted to the item on the selected line.

Saves the current column widths for the details section of the sales order module.

Opens the Lookup Items form defaulted to the item on the selected line.

1.The Estimated Shipping Date module must be activated.  If you have not purchased a license, please contact your project manager or a Seradex Sales Representative.
2.Estimated Shipping Date must be used in conjunction with the Scheduling module.  Orders must be scheduled using the Scheduling module for Estimated Shipping Date to calculate the estimated shipping date as scheduling data is required for the calculations. 


There are 2 key areas that will influence the projected ship date for an item:

1.Materials
2.Labour


Materials


The Material tab will display the status of all items required for the line item. Items in red are insufficient to meet the requirement for the line item. In this case, the system calculates the availability date based on the Primary Vendor lead time.


clip0026


Labour


The availability of labour is based on the following calculation for hours required:


Hours required for line item = (Operation Runtime Hrs x Line Item Qty) + Setup Time


The Open Hrs are calculated as the current open hours for a specific operation based on Seradex Scheduling data.  The user can modify the Priority of the Estimate line Item to view the potential ship dates based on priority and shop loading. 


Start Date and Finish Date


Operation number 10 or the first operation for the Work Order should have an Estimate Start Date of: “Earliest Start Date” (materials) + Hours Pre-scheduled for that operation (for that priority). The Estimated Finish Date would be the Estimated Start Date + Setup Time + run time for that specific SO or Estimate qty.


Operation number 20 or the next operation would then have an Estimated Start Date of: Estimate Finish Date of the previous operation + Hours Pre-scheduled on open WOs for that operation (for that priority).


So on, until an estimated Ship Date is achieved.


NOTE: Pre-scheduled hours for each operation will vary based on the Priority of the open work orders. Example: Someone doing an estimate for customer should be able to use the “Estimated Shipping Date” function and change the Priority which would then change the Hrs Pre-Scheduled.


The priority cannot be selected in the Estimate or Sales Order module which means that when the Work Order is generated someone needs to notify production personnel to change it.

Opens the file attachment dialogue by which the user can browse to and select a file to attach to the selected line.

Restores the column widths of the details section of the sales order module to their default widths.