|
In this Section:
Creating New Transfers
Select ADD, and then pick an item and location. Select lot/serial if applicable. Repeat for as many items as required. Select the To location. Only one To location can be selected for each transfer.
In the To section of the form you can also pick an owner e.g. Work Order as well as a specific Work Order No to transfer items.
When you are on the Work Order form you can select Work Order Transfer from the Tools menu and automatically create a transfer. This will create a transfer moving all items on the bills of material for that work order from Location Raw to Location WIP. You must still manually open the transfer approve it and update inventory. You may also edit the transfer at that time.
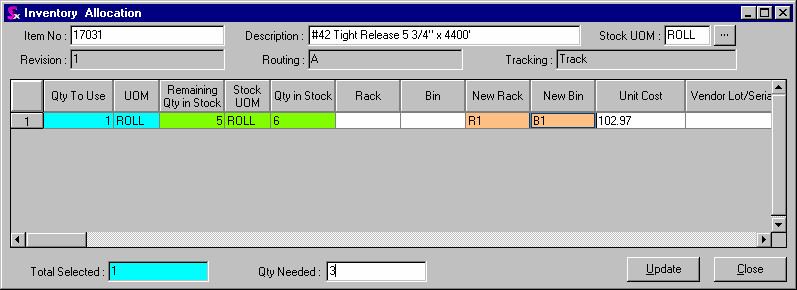
Inventory Transfer Line Items are color coded blue if they are a lot/serial tracked item. NOTE: The Qty Required is 0 if the item is tagged as a Non Stock Item. These items will appear on the Mat Req to be purchased specifically for the order. You can override this if you happen to have inventory of a non stock item.
The image below illustrates Inventory Details. If you elect to track inventory at the Rack and Bin level or if your track Lot or Serial Nos you will utilize this form. This shows a transfer from an empty Rack and Bin to a specific Rack and Bin.
Copying Transfers and Creating Reversing Transfers
OrderStream provides the ability to copy approved inventory transfers. This is beneficial when similar inventory transfers must be created multiple times. An example of this is the tracking of items which are in transit to an outside location. Two inventory transfers would be required to do this: one to transfer the item(s)s into the in transit location and another to transfer the item(s) from the in transit location into the destination location. To create the second transfer, simply copy the initial transfer and set the from and to locations for the new transfer.
An extension of this functionality enables you to reverse a transfer, which will automatically reverse the from and to locations to transfer the materials to their original location. This will also remove any ownership assigned to the materials via the initial transfer.
To copy an approved transfer:
1. Go to the Tools menu
2. Select Copy Transfer
The form displayed below will be opened.
Set the From Location and the To Location then click the Copy button. If you wish to reverse a transfer check the Create Reversing Transfer checkbox to automatically set the To and From Locations then click the Copy button.
A new inventory transfer will be created. Review and approve the new transfer to update inventory.
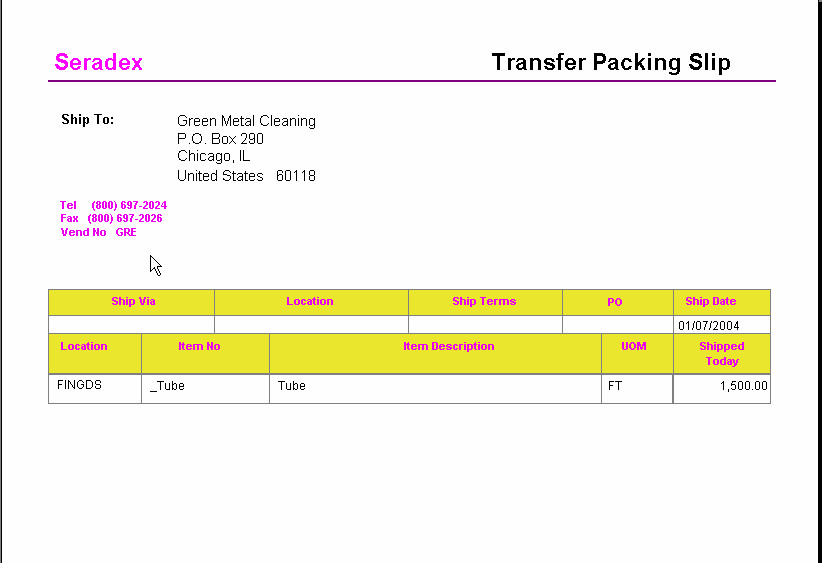
Transferring Inventory to an Outside Location
You can transfer to an outside location and print a packing slip as shown in the image. This report is launched from the Report menu.
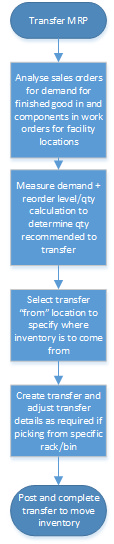
Multi Facility Transfer MRP
Transfer MRP screen analyses requirement for a buy/sell/stock or make/sell/stock item on sales orders. Couples that with the reorder level specified at the item level for the facility. It will recommend that you transfer that qty to the facility location to satisfy current and future demand. You will need to select the from location and process the screen to generate a transfer.
Finished good demand for reorder replenishment
The Transfer MRP function is accessed through the tools menu from within the transfer screen.
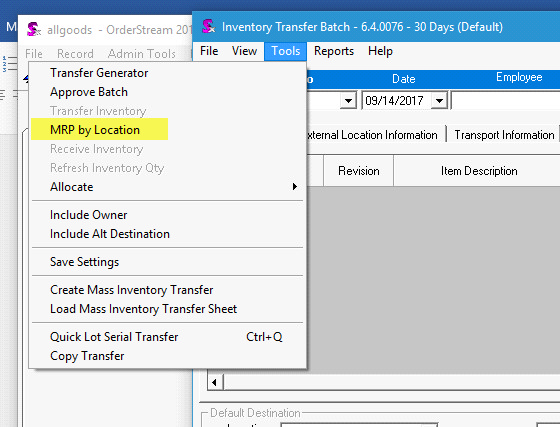
A valid user/employee record must exist in able to launch the screen.
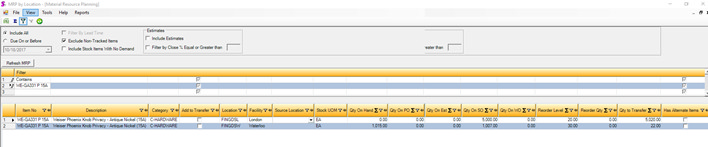
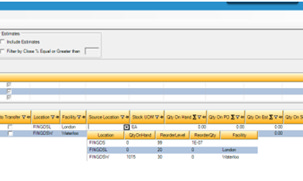
Transfer MRP will show you the quantity that are required of the item at the various facility locations. If no facility reorder information is provided for the item, it will show as its item main tab location.
By checking the add to transfer button and selecting a source location to get inventory from, you will be able to (once processed button is activated) create a transfer moving inventory from the source location selected to the facility location that required the inventory. You can change the qty to transfer to override the system generated quantity if you wish to transfer more or less of the item.
The source location dropdown will show you all locations that have unallocated quantities of the item in question.
The MRP screen has a facility filtering option at the top of the mrp form.
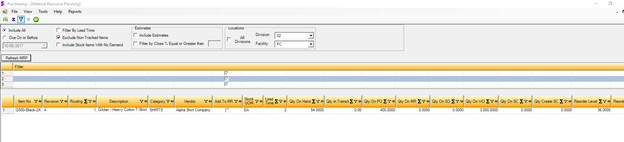
By selecting the division/facility combo you will limit the MRP calculations to be based on the facility selected. All other facility or nonattached locations will be ignored from calculation.
The division/facility combo boxes will default to whatever division/facility location that has been specified in the employee module.
By selecting all divisions, the system will not filter mrp calculations and system will process mrp calculations as if facilities did not exist and gather all requirements and supply information regardless of facility orientation. (note: when processing with all divisions, the system will utilize the items main tab default location and reorder information as opposed to any of the individual facilty reorder information)
If there is demand for an item that has not had its facility reorder information provided, the item will not appear in facility filtered mrp but would appear on the all division output. Any resulting PO created from this demand will go to the items main tab location.
Standard include stock with no demand functionality and due on or before filtering will work within facility filtering or in all division mode.
Resulting POs added to mat req have a field to indicate the location that it is to be sent to. Any po created will inherit this location and change the ship to location accordingly to that facilities setup.
|


