|
Prerequisites
The Bar Code Data Collection module must be activated. If you have not yet purchased a license, please contact your project manager or a Seradex Sales Representative.
Module Overview
The Bar Code Data Collection module allows production employees to report their labour directly to work orders on a real time basis and eliminates the need for after-the-fact labour entry from time cards or labour tickets and labels. Employees can enter their labour via keypad entry or bar code scanning. Extra computers are located on the shop floor and employees use the computer as a time clock for clocking in and out of work order routing sequences.
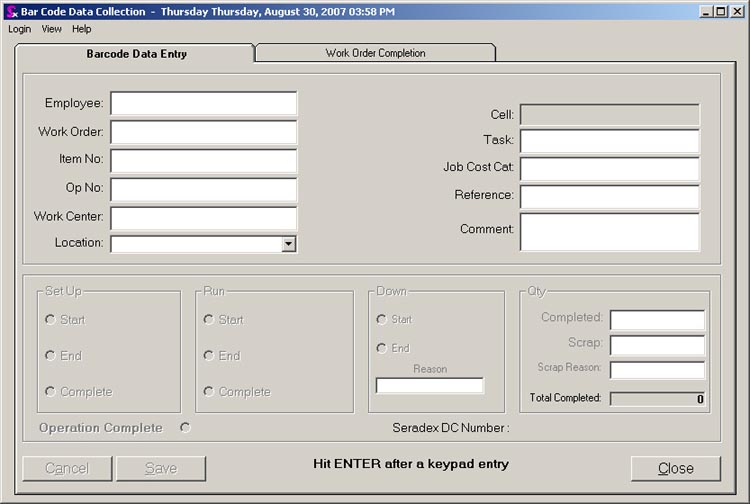
The Bar Code Data Collection form is shown below:
How it works:
1) Install it on a machine that the barcode device is connected to.
2) The Installer automatically initiates an install of application on the hand held device.
3) If you happen to have a previous install of the bar code transfer it is recommended to uninstall it first.
4) Programs to ensure are removed if you need to uninstall are:
a. Previous version of BarCodeTransfer. You can check version by right clicking the BarCodeTransfer, selecting Properties and then choose the Details tab.
b. Microsoft .NET CF (Your Version) ENU-String
c. Symbol Managed Class Libraries
d. Microsoft SQL Client (Your Version)
e. Microsoft .NET CF (Your Version)
You can also install onto multiple handheld devices, one at a time, using a single install/uninstall.
NOTE:
If one of the Symbol Barcode scanners has a problem with the install, a hard reboot should clear the bad install from the device. Remember to ensure that the AppConfig.xml file is pointing to your database server, and your transfer web service server. Also if you do a hard reboot, ensure that you setup the wireless network connection again.
Data Collection Procedure
1) The Employee wands in a bar coded ID badge (or a magnetic stripe badge). This will be the employees name or employee no.
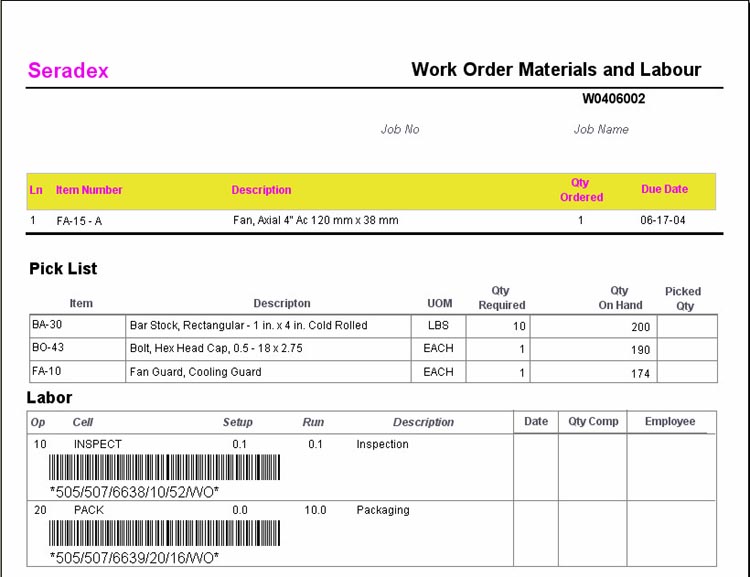
2) If the employee is working on a Work Order (as shown below) they would scan in the bar code which reflects the operation they will be performing. Upon scanning in the bar code the WO, Item No., Op No., Task and Job Cost category will display. There will be a password prompt on allocating Items that are not part of the Work Order's BOM. Blocked is the ability to transfer any item that is not the Sales Order's Line Item, or the Item in the Subcontracting document's Materials tab.
The bar code for each task will contain Work Order, Item & Specs, Op No., Cell, Job Cost Category and Task. Note the above report example is shown for illustrative purposes. Your report may be in a different format.
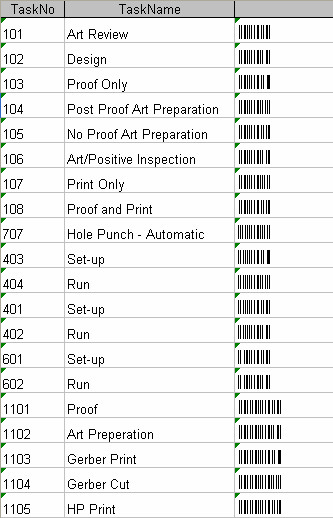
3 - The operator should then scan in the Work Center (equipment) that they are working on. The Work Center is a separate bar code list containing all work centers. There will be a laminated sheet at each work station containing appropriate data lists as shown below:


At this point, the Bar Code form looks like this:

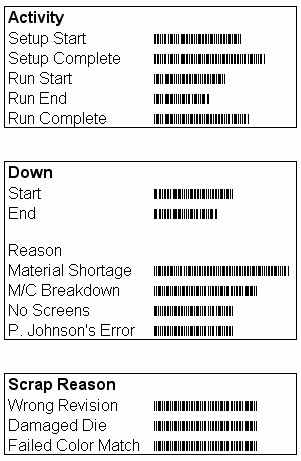
4 - The operator then scans the SetUp Start or the Run Start bar code and then clicks on Save. When the employee clicks on the Save barcode the entry will be saved with the system time and date. (Start, End, Save and Complete codes are displayed in screenshot below and should be distributed to all operations)
5 - When the operator is ending the SetUp or Run, the operator will scan in the corresponding End bar code from the code listing. This does not necessarily mean the operation is complete.
6 - At this time the operator can key enter the Completed and/or Scrap quantities for that entry. The Qty Completed will default to 0 for the first entry on an operation or it will display the quantity previously completed on that operation. There is also a Scrap Reason available. Scrap Reason must be set up in the Scrap Reason table in the database.
7 - To complete the operation, scan in the corresponding Run Complete bar-code.
Comments are free text.
The new entries appear as follows:

Work Order Completion
At the completion of all labour operations for any Work Order, you have the option of entering data relating to Finished Good Scrap quantities with scrap codes into the form shown in screenshot below.
This form also allows you to add Finished Good quantities to inventory and thereby relieve raw materials. You have complete listing of all raw materials to be used for this Work Order.
To complete this operation, enter the Qty to Inventory. If it is necessary to adjust the raw material quantities, you can directly access the Work Order by clicking on the Work Order button and use the Inventory Allocation form.
Now click on the Process button.
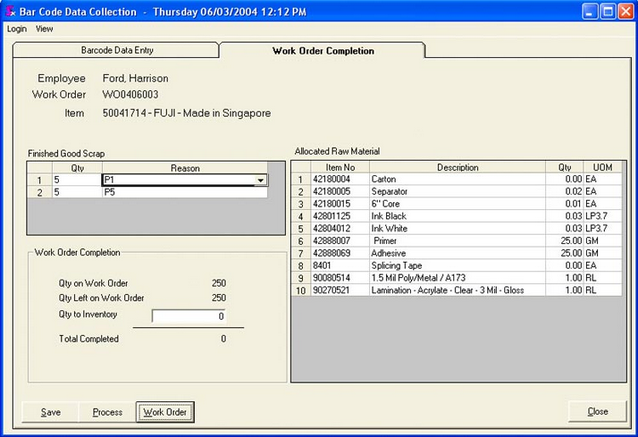
You can enter a list of scrap quantities and specify a reason code for each. The reason field is a combo which is populated from the ScrapReason table. The scrap data entered is linked to the work order header and to the employee that entered the data. Scrap data is saved to the WorkOrderScrap table; this feature is for scrap tracking and reporting only.
NOTE: If there was no QTY available at all for a particular item then that item's cost would not be included in the final cost. This happens when transfers are not used and will use STD Cost in these cases.
|


