|
Creating a New Physical Inventory Batch
To begin a new physical you must first generate the tags. There are three ways to generate tags:
| 1. | Generate tags for items that exist in inventory (you can always add new ones to accommodate new parts) |
| 2. | Generate one tag per item in the system |
| 3. | Generate no tags; only add tags as needed. |
To create system generated tags, go to the Tools Menu and select Create New Physical Batch.
You will now be presented with a form that will allow you to control the tag printing.
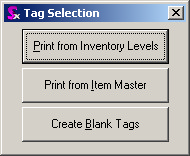
Print from Inventory Levels: This will generate one tag per Item, Location, Rack and Bin and also Lot or Serial number if the item is Lot or Serial Tracked. The item requires existing inventory in the system at the time of the physical to have a tag. You can always add new ones, as you need them
Print from Item Master: This will generate tags for every item the Item Master database regardless of existing inventory.
Create Blank Tags: This will generate a set of blank tags.
Once you select the format you want, you will be presented with the form that allows you to do additional filtering. For the most part if you are doing a physical you will want all locations. Note that WIP is not included in the counts. If any of your locations are off site and you are doing separate counts for those, then de-select them.
If you wish to generate a tag for each item in each rack/bin location, make sure the Filter by Rack/Bin check box is checked. Note in the image below how the locations are broken out by racks and bins.
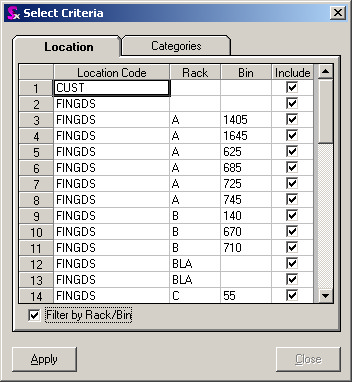
If rack/bin locations are not relevant to you uncheck the Filter by Rack/Bin check box. The form will reload and not take the racks and bins into consideration.
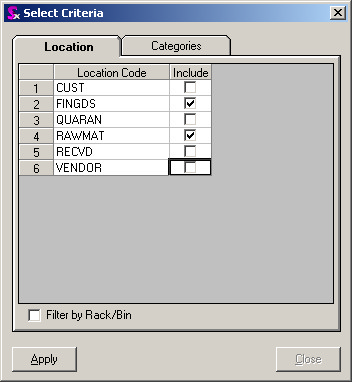
In the example shown above, only FINGDS and RAWMAT will be printed.
Click on Apply then close. Now the tags will be generated. Please note: Do not select that option again until it is time to do another complete physical and the current one is adjusted to inventory. If you do you will lose everything and will have start all over again.
Note the Tag Numbering Sequence. You can define this in the GenKey form, which is in Utilities/Application Preferences. It works the same as Sales Order, Estimate Etc. It is a good idea to include the year in the key.
Now that we have the tags you can print them out. You can print the tags via the Reports menu. There are two standard tag reports to choose from: Inventory Tags and Inventory Tags with Duplicates. These tag reports are also available from the Reports Switchboard in the Inventory section.
The Inventory Tags report prints one tag per item. This tag can be printed using Avery Card Stock (template number 5392). A sample of the tag is featured in the following image.
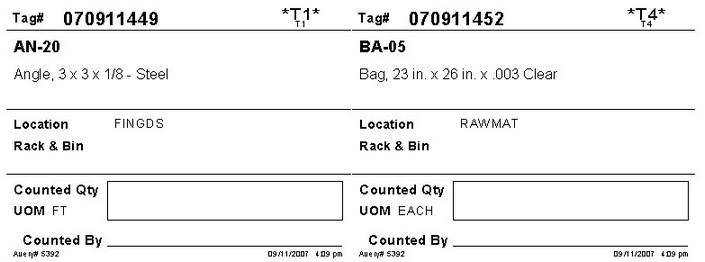
The Inventory Tags with Duplicates prints two tags per item. The idea is that one tag will be placed with the counted inventory while the other tag will be returned to the office to be used for data entry. This tag can be printed using Avery Card Stock (template number 5164). The tag is shown in the following image.

If you require your own tag format, Seradex can accommodate you with a custom report.
At this point the tags would be handed out to those individuals that are doing the physical counting.
Entering the Counted Quantities
Now that the tags are generated and given out, the counts will start to come back.
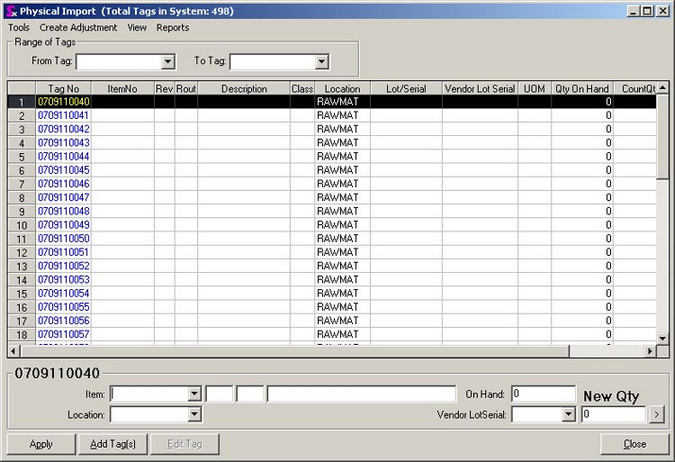
When you open the Physical Inventory module, you will notice there are two combo boxes. If you click on Apply when they are blank it will load all tags based on the view criteria. If you get a block of tags back you can pick the range to limit the list.
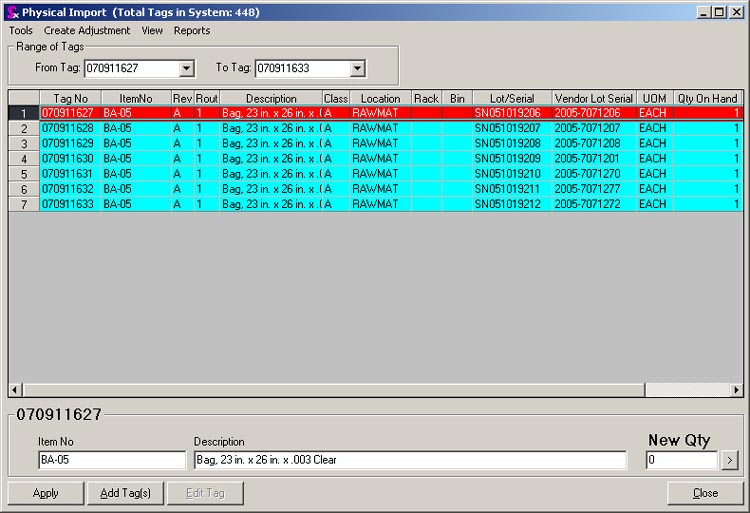
To change the count, highlight the tag in the grid, and put the physically counted quantity in the New Qty box. Then click the arrow button (or press the Enter key). If the count is the same, you must still enter the counted qty. Note that the selected line will appear with a red background.
Tag Filtering
In addition to viewing a range of tag numbers, you can use one of the 4 options in the View menu designed to limit the tags which can be viewed.
Uncounted Tags: This will limit the list to tags that have not yet been counted. This is useful because as the physical progresses you dont have to see the ones already counted. This also helps you determine any tags that are still outstanding.
Counted Tags: This will show all tags that have been counted. This is used for recounts.
Blank Tags: This will show all tags that were created without a part number. It is common to generate a number of blank tags for parts that are not accounted for in the original tag set. They can be filled in by hand by the counter and updated later.
All Tags: This shows all tags (the default view)
Showing or Hiding Tags for Discontinued Items
If it is necessary to enter counted quantities for items which have been discontinued you can view the tags for these items by using the Show Items options within the View menu.
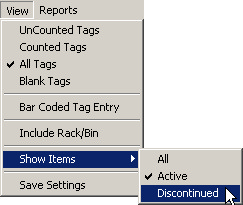
Selecting All will display tags for active and discontinued items, Active will display tags only for active items while Discontinued will show tags only for discontinued items.
You can save the View menu settings you have established by selecting Save Settings. The next time you open Physical Module the View menu settings will be as you saved them.
Bar Coded Data Entry
Entering the counted quantities can be made easier by using a bar code scanner to scan the bar code on the physical count tags to load the item then simply entering the quantity counted. To switch the Physical Inventory module to bar code mode, open the View menu and select Bar Coded Tag Entry. The form reload and will appear as shown below.
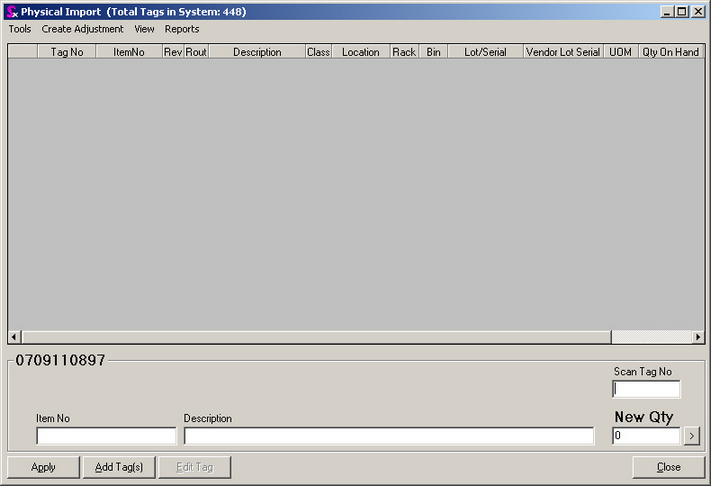
Scan the bar code on the inventory tag to load the item on the form. Then enter the quantity counted into the New Qty field and either click the arrow button or press the enter key to submit the counted quantity. Repeat this process for all remaining tags.
Adding New Tags
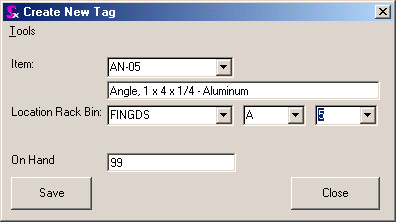
If you need to generate additional tags, click the Add button on the main form.
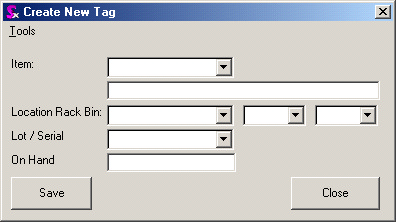
Here you can pick the item number, Rack, Bin, and Lot/Serial if applicable. It is often found that one part will be in one or more physical areas of the plant (not to be confused with separate Seradex locations). The first area is accounted for on one tag and you will need additional tags for the other areas. Note that multiple tags for the same item, location, rack and bin will be consolidated upon completion.
Click on Save to generate the new tag. You can keep this form open and add as many as you want.
If you leave the part number blank it will generate a blank tag.
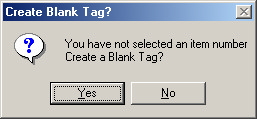
If you wish to create a set of blank tags, you can go to the tools of the Create New Tag form and select Blank tags. It will ask you how many you want to generate.
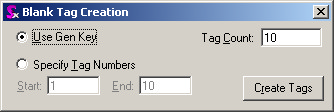
You can either enter a number of tags in the Tag Count field or specify a start and end number. If you enter a tag count quantity and a start number the end number will be calculated. Likewise if a start number and an end number are entered the tag count will be calculated.
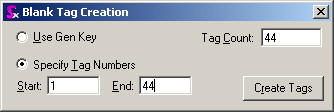
Click the Create Tags button to generate the new tags.
Editing Blank Tags
Blank tags have to be assigned a part number before you complete the physical. You can use the View/Blank Tag filter to display them.
The bottom portion of the form will allow you to edit the Blank Tag selected.
Now you can select the part number from the Item combo that goes with the selected tag.
NOTE: If you find a part during the physical that does not exist in the OrderStream item master, you must add that part to the database. Pick the part, enter the new quantity and click the arrow button.
Creating The Physical Adjustment
Once the physical is completed, it is time to adjust inventory. Any tag that is not counted at this time will be assumed to be 0 and will be adjusted as 0 so please ensure you have accounted for all your tags.
To create the adjustment, go to Tools à Create Adjustment
Please note that all this does is create the adjustment. You still have to view that adjustment in Inventory/Inventory Adjustment, approve it and update inventory.
|


